はじめに
The removal of the back panel is necessary for almost all of the repairs for the Canon PowerShot SX60 HS.
The back panel protects the internal components and sensitive electronics in the device from the elements and minor damages.
必要な工具と部品
-
-
-
Make sure to power off the device before completing any more steps.
-
Remove the battery by releasing the orange clip in the battery compartment.
 FixBotに聞いてみる
-
-
-
Remove the rubber eye piece by pulling it back.
-
Use the Phillips #00 screwdriver to remove the two 5mm #00 screws located on the side of the viewfinder.
-
-
-
-
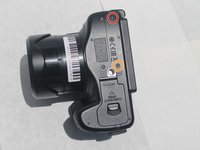
Use the Phillips #00 screwdriver to remove the 4mm #00 screw located on the bottom left of the device.
-
Use the Phillips #00 screwdriver to remove the 5mm #00 screw located on the bottom center of the device.
-
Use the Phillips #00 screwdriver to remove the 7mm #00 screw on the right top corner of the camera, just above the media ports.
-
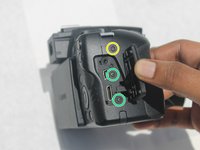
Use the Phillips #00 screwdriver to remove the two 5mm #00 screws located on the right side, under the media port dust cover.
-
-
この手順で使用する道具:Tweezers$4.99
-
Use the iFixit opening tool to pry off the back panel.
-
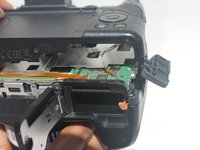
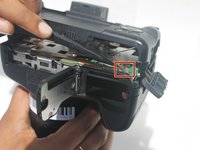
Use the black spudger to unclip the ribbon located behind the battery compartment. Then remove it using the nylon tipped tweezers.
-
Once the ribbon is unplugged, remove the back panel from the camera body.
-
-




To reassemble your device, follow these instructions in reverse order.

チーム

Embry-Riddle Aeronautical University, Team S3-G7, Watkins Summer 2019 Embry-Riddle Aeronautical University, Team S3-G7, Watkins Summer 2019人のメンバー
ERAU-WATKINS-SU19S3G7
4 メンバー
8のガイドは作成済み
