メインコンテンツにスキップ
リペアコミュニティに参加 - アカウントの作成

Canon PowerShot SX520 HS Lens Replacement

必要な工具と部品

    1. Canon PowerShot SX520 HS Lens Replacement, Battery: 手順 1、 1の画像 1
      • Using your fingers, slide the battery compartment door to the right until it unlocks.

      FixBotに聞いてみる

      コメントを追加

    2. Canon PowerShot SX520 HS Lens Replacement: 手順 2、 1の画像 1
      • Rotate the door along hinges to open.

      • Take out the battery with your fingers.

      FixBotに聞いてみる

      コメントを追加

    1. Canon PowerShot SX520 HS Lens Replacement, Back Face: 手順 3、 3の画像 1 Canon PowerShot SX520 HS Lens Replacement, Back Face: 手順 3、 3の画像 2 Canon PowerShot SX520 HS Lens Replacement, Back Face: 手順 3、 3の画像 3
      • Remove 2-3.4 mm screws that secure the back panel using a Phillips #000 screwdriver.

      • Remove 4-4 mm screws on the left and right sides of the camera using a Phillips #000 screwdriver.

      FixBotに聞いてみる

      コメントを追加

    2. Canon PowerShot SX520 HS Lens Replacement: 手順 4、 1の画像 1
      • Remove 2-4 mm screws that secure the bottom of the camera using a Phillips #000 screwdriver.

      FixBotに聞いてみる

      コメントを追加

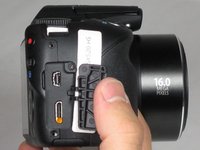
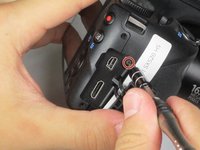
    3. Canon PowerShot SX520 HS Lens Replacement: 手順 5、 2の画像 1 Canon PowerShot SX520 HS Lens Replacement: 手順 5、 2の画像 2
      • Pull back the rubber facing to access the A/V and HDMI output compartment.

      • Remove 1-3.4mm screw inside the compartment using a Phillips #000 screwdriver.

      FixBotに聞いてみる

      コメントを追加

    4. Canon PowerShot SX520 HS Lens Replacement: 手順 6、 1の画像 1
      • Once all screws are removed, pull the back facing off with your fingers.

      FixBotに聞いてみる

      コメントを追加

    1. Canon PowerShot SX520 HS Lens Replacement, LCD Screen: 手順 7、 1の画像 1
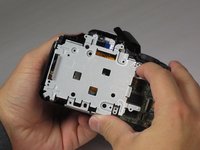
      • Remove 3-4.4 mm screws that secure the small metal plate using a Phillips #000 screwdriver.

      FixBotに聞いてみる

      コメントを追加

    2. Canon PowerShot SX520 HS Lens Replacement: 手順 8、 1の画像 1
      • Carefully pop out the LCD screen with your fingers.

      FixBotに聞いてみる

      コメントを追加

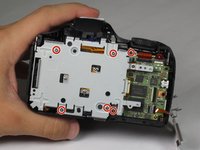
    1. Canon PowerShot SX520 HS Lens Replacement, Metal Plate: 手順 9、 3の画像 1 Canon PowerShot SX520 HS Lens Replacement, Metal Plate: 手順 9、 3の画像 2 Canon PowerShot SX520 HS Lens Replacement, Metal Plate: 手順 9、 3の画像 3
      • Remove 6-4.4 mm screws that secure the metal cover using a Phillips #000 screwdriver.

      • Remove 2-2.5 mm screws that secure the back panel using a Phillips #000 screwdriver.

      • After all 8 screws are removed, pull the metal plate out with your fingers.

      FixBotに聞いてみる

      コメントを追加

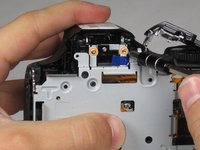
    1. Canon PowerShot SX520 HS Lens Replacement, Lens: 手順 10、 1の画像 1
      • Unlcip the large cable by pulling up on the metal part with your finger.

      • Slide out the 2 smaller cables with your fingers.

      FixBotに聞いてみる

      コメントを追加

    2. Canon PowerShot SX520 HS Lens Replacement: 手順 11、 1の画像 1
      • Lift up the lens by grabbing the sides with your fingers.

      FixBotに聞いてみる

      コメントを追加

終わりに

To reassemble your device, follow these instructions in reverse order.

キャンセル: このガイドを終了できませんでした。

6 の人々がこのガイドを完成させました。

作成者

5人の作成者と共同で作成されました。

Lisa Choe

メンバー登録日: 09/22/15

460 ポイント

3のガイドは作成済み

チーム

Baylor, Team 4-4, Williams Fall 2015 Baylor, Team 4-4, Williams Fall 2015人のメンバー

BU-WILLIAMS-F15S4G4

4 メンバー

12のガイドは作成済み

1件のガイドコメント

guide is unfinished; dropping to the point of lens group extraction without going on further. I found it, useless.

SimoneGallina - 返信 共有

コメントを追加

統計データ:

過去 24時間: 6

過去 7 日: 10

過去 30 日: 46

今までの合計 3,812