メインコンテンツにスキップ
リペアコミュニティに参加 - アカウントの作成

Canon PowerShot SD700 LCD screen Replacement

必要な工具と部品

  1. Canon PowerShot SD700 LCD screen Replacement, Outside Case: 手順 1、 1の画像 1
    • Turn off the camera by pressing the power button above the LCD screen.

    FixBotに聞いてみる
  2. Canon PowerShot SD700 LCD screen Replacement: 手順 2、 1の画像 1
    • Remove the two small screws on the bottom of the camera using a Phillips #00 screwdriver.

    FixBotに聞いてみる
  3. Canon PowerShot SD700 LCD screen Replacement: 手順 3、 1の画像 1
    • Use a Phillips #00 screwdriver to remove the two small screws on the right side of the camera.

    FixBotに聞いてみる
  4. Canon PowerShot SD700 LCD screen Replacement: 手順 4、 1の画像 1
    • Use a Phillips #00 screwdriver to remove the screw on the left of the camera under the A/V out digital label.

    FixBotに聞いてみる
  5. Canon PowerShot SD700 LCD screen Replacement: 手順 5、 1の画像 1
    • Use a Phillips #00 screwdriver to remove the screw on the bottom of the camera near the battery and memory card slots.

    • This screw will be longer than the rest of the screws.

    FixBotに聞いてみる
  6. Canon PowerShot SD700 LCD screen Replacement: 手順 6、 1の画像 1
    • Remove the front, back, and side casings from the camera and set to the side.

    FixBotに聞いてみる
  7. Canon PowerShot SD700 LCD screen Replacement, LCD screen: 手順 7、 1の画像 1
    • Remove the two screws that connect the LCD and backlight to the main body of the camera.

    FixBotに聞いてみる
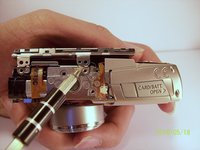
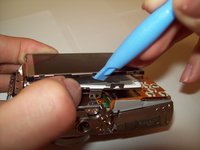
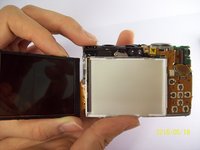
  8. Canon PowerShot SD700 LCD screen Replacement: 手順 8、 3の画像 1 Canon PowerShot SD700 LCD screen Replacement: 手順 8、 3の画像 2 Canon PowerShot SD700 LCD screen Replacement: 手順 8、 3の画像 3
    • Gently pry the LCD and the backlight from the main body of the camera.

    • Gently pry the LCD from the backlight.

    • The thin ribbon cable is for the backlight.

    • The thick ribbon cable is for the LCD screen.

    FixBotに聞いてみる
  9. Canon PowerShot SD700 LCD screen Replacement: 手順 9、 1の画像 1
    • Carefully lift the ZIF connector that covers the thick ribbon cable.

    • This ZIF connector is fragile. Use caution when lifting it from its down position.

    • Insert the new LCD and reassemble the camera.

    FixBotに聞いてみる
終わりに

To reassemble your device, follow these instructions in reverse order.

2 の人々がこのガイドを完成させました。

作成者

5人の作成者と共同で作成されました。

Emilio Rossi

メンバー登録日: 04/07/11

113 ポイント

3のガイドは作成済み

チーム

Cal Poly, Team 9-71, Walters Spring 2011 Cal Poly, Team 9-71, Walters Spring 2011人のメンバー

CPSU-WALTERS-S11S9G71

4 メンバー

9のガイドは作成済み

0件のガイドコメント

コメントを追加

統計データ:

過去 24時間: 0

過去 7 日: 8

過去 30 日: 49

今までの合計 3,017