メインコンテンツにスキップ
リペアコミュニティに参加 - アカウントの作成

Canon PowerShot SD30 Control Panel Replacement

必要な工具と部品

    1. Canon PowerShot SD30 Control Panel Replacement, Front Cover: 手順 1、 2の画像 1 Canon PowerShot SD30 Control Panel Replacement, Front Cover: 手順 1、 2の画像 2
      • Be sure to remove the wrist strap and battery before removing the cover.

      • Remove the two 2mm black screws that are located on the underside of the camera.

      • Remove the two 3mm silver screws from the right side of camera.

      FixBotに聞いてみる

      コメントを追加

    2. Canon PowerShot SD30 Control Panel Replacement: 手順 2、 1の画像 1
      • Gently remove the front cover.

      FixBotに聞いてみる

      コメントを追加

    1. Canon PowerShot SD30 Control Panel Replacement, Back Cover: 手順 3、 3の画像 1 Canon PowerShot SD30 Control Panel Replacement, Back Cover: 手順 3、 3の画像 2 Canon PowerShot SD30 Control Panel Replacement, Back Cover: 手順 3、 3の画像 3
      • Remove the wrist strap and battery before removing the back cover.

      • Remove the 2mm screw from the back of the camera.

      • Remove two 2mm screws from the bottom of the camera.

      • Remove two 2mm screws the left side of camera.

      FixBotに聞いてみる

      コメントを追加

    2. Canon PowerShot SD30 Control Panel Replacement: 手順 4、 1の画像 1
      • Gently remove the back cover.

      FixBotに聞いてみる

      コメントを追加

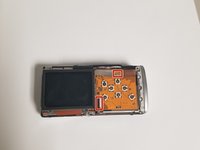
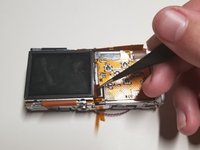
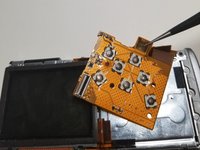
    1. Canon PowerShot SD30 Control Panel Replacement, Control Panel: 手順 5、 3の画像 1 Canon PowerShot SD30 Control Panel Replacement, Control Panel: 手順 5、 3の画像 2 Canon PowerShot SD30 Control Panel Replacement, Control Panel: 手順 5、 3の画像 3
      この手順で使用する道具:
      Tweezers
      $4.99
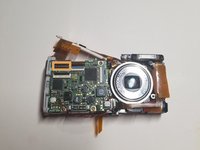
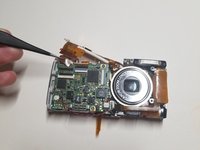
      • Use the tweezers to pull up on the piece of black plastic connected to the ribbon to unhook and remove the ribbon connected to the screen.

      • You also have to pull up on the top part of the control panel because it is connected to the metal by a sticky pad.

      FixBotに聞いてみる

      コメントを追加

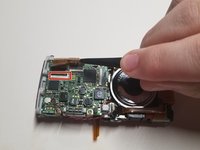
    2. Canon PowerShot SD30 Control Panel Replacement: 手順 6、 3の画像 1 Canon PowerShot SD30 Control Panel Replacement: 手順 6、 3の画像 2 Canon PowerShot SD30 Control Panel Replacement: 手順 6、 3の画像 3
      • Turn the camera over to the side with the lens and remove the ribbon on the left side.

      • After removing the ribbon there will be a second ribbon to remove that was hiding underneath the first ribbon.

      FixBotに聞いてみる

      コメントを追加

    3. Canon PowerShot SD30 Control Panel Replacement: 手順 7、 1の画像 1
      • Lift up the button that connects to the power button of the camera so you can remove the control panel.

      FixBotに聞いてみる

      コメントを追加

    4. Canon PowerShot SD30 Control Panel Replacement: 手順 8、 1の画像 1
      • Remove the control panel from the camera.

      FixBotに聞いてみる

      コメントを追加

終わりに

To reassemble your device, follow these instructions in reverse order.

キャンセル: このガイドを終了できませんでした。

2 の人々がこのガイドを完成させました。

作成者

2人の作成者と共同で作成されました。

Diego Hughes

メンバー登録日: 09/21/18

139 ポイント

1ガイドが承認済み

チーム

University of North Texas, Team S5-G3, Thompson Fall 2018 University of North Texas, Team S5-G3, Thompson Fall 2018人のメンバー

UNT-THOMPSON-F18S5G3

4 メンバー

40のガイドは作成済み

0件のガイドコメント

コメントを追加

統計データ:

過去 24時間: 1

過去 7 日: 6

過去 30 日: 24

今までの合計 588