メインコンテンツにスキップ
リペアコミュニティに参加 - アカウントの作成

Canon EOS Rebel T6i Flash Assembly Replacement

必要な工具と部品

    1. Canon EOS Rebel T6i Flash Assembly Replacement, Flash Assembly: 手順 1、 3の画像 1 Canon EOS Rebel T6i Flash Assembly Replacement, Flash Assembly: 手順 1、 3の画像 2 Canon EOS Rebel T6i Flash Assembly Replacement, Flash Assembly: 手順 1、 3の画像 3
      • Remove two 6.8 mm JIS #000 screws on the right side.

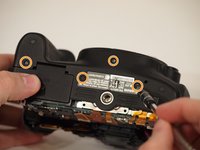
      • Remove six 5.3 mm JIS #000 screws on the bottom.

      • Remove two 5.3 mm JIS #000 screws on either side of the viewfinder.

      FixBotに聞いてみる

      コメントを追加

    2. Canon EOS Rebel T6i Flash Assembly Replacement: 手順 2、 2の画像 1 Canon EOS Rebel T6i Flash Assembly Replacement: 手順 2、 2の画像 2
      • Remove one 5.9 mm JIS #000 screw on the top right.

      • Remove one 3.4 mm JIS #000 screw on the top left.

      FixBotに聞いてみる

      コメントを追加

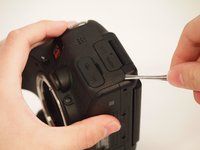
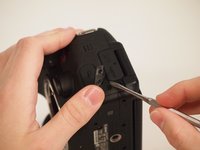
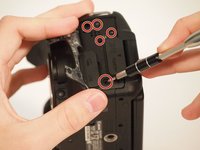
    3. Canon EOS Rebel T6i Flash Assembly Replacement: 手順 3、 3の画像 1 Canon EOS Rebel T6i Flash Assembly Replacement: 手順 3、 3の画像 2 Canon EOS Rebel T6i Flash Assembly Replacement: 手順 3、 3の画像 3
      • Using a metal spudger, pry the rubber grip off of the casing on the left side of the camera.

      • Potential for device damage: Be careful not to rip the rubber with the metal spudger.

      • Remove five silver 5.8 mm JIS #000 screws from underneath the grip.

      FixBotに聞いてみる

      コメントを追加

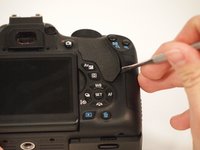
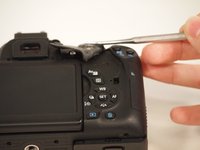
    4. Canon EOS Rebel T6i Flash Assembly Replacement: 手順 4、 2の画像 1 Canon EOS Rebel T6i Flash Assembly Replacement: 手順 4、 2の画像 2
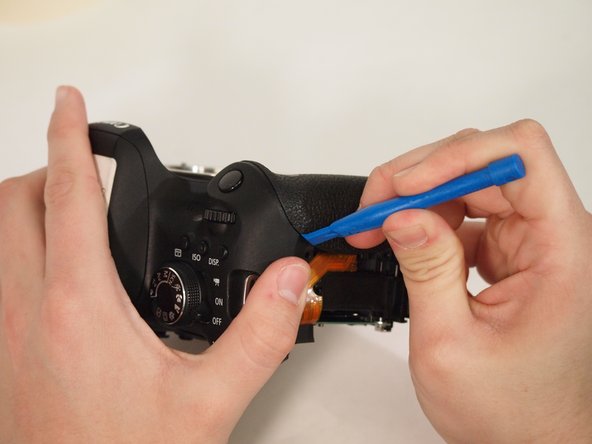
      • Using the metal spudger, pry the rubber grip located just below the turndial.

      • Potential for device damage: Be careful not to rip the rubber.

      FixBotに聞いてみる

      コメントを追加

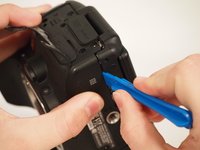
    5. Canon EOS Rebel T6i Flash Assembly Replacement: 手順 5、 2の画像 1 Canon EOS Rebel T6i Flash Assembly Replacement: 手順 5、 2の画像 2
      • Carefully use the plastic opening tool to pry the casing apart along the seam.

      • Follow the seam with the plastic tool until the back is ready to remove.

      • Potential for device damage: Make sure you use the grounding strip to remove the chance of discharging static electricity into the internal components.

      FixBotに聞いてみる

      コメントを追加

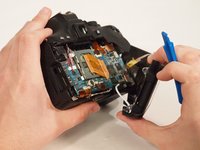
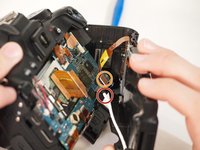
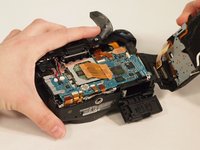
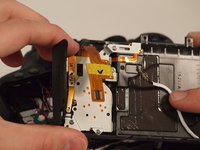
    6. Canon EOS Rebel T6i Flash Assembly Replacement: 手順 6、 3の画像 1 Canon EOS Rebel T6i Flash Assembly Replacement: 手順 6、 3の画像 2 Canon EOS Rebel T6i Flash Assembly Replacement: 手順 6、 3の画像 3
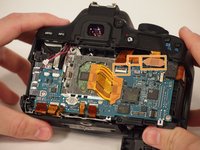
      • Notice the two connections attaching the back of the camera to the motherboard.

      • To disconnect the white wire, pinch the wire casing and pull it directly out from the camera.

      • This may take a very small amount of strength; however, do not force or pry it.

      • To disconnect the ribbon connector, softly pull the back away from the motherboard. It should come undone with little force.

      • Once removed, set the back in a safe place.

      FixBotに聞いてみる

      コメントを追加

    7. Canon EOS Rebel T6i Flash Assembly Replacement: 手順 7、 2の画像 1 Canon EOS Rebel T6i Flash Assembly Replacement: 手順 7、 2の画像 2
      この手順で使用する道具:
      Tweezers
      $4.99
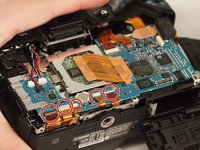
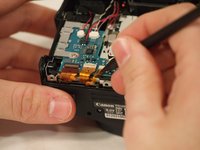
      • Remove the five ribbon connectors along the bottom of the assembly using either needle nose tweezers or a plastic opening tool to flip the small flaps to the "up" position.

      • Use a nylon spudger to pull each ribbon connector out of its connection using the hole in the center of the ribbon.

      FixBotに聞いてみる

      コメントを追加

    8. Canon EOS Rebel T6i Flash Assembly Replacement: 手順 8、 1の画像 1
      • Remove the button cell battery from the motherboard using a pair of tweezers.

      FixBotに聞いてみる

      コメントを追加

    9. Canon EOS Rebel T6i Flash Assembly Replacement: 手順 9、 2の画像 1 Canon EOS Rebel T6i Flash Assembly Replacement: 手順 9、 2の画像 2
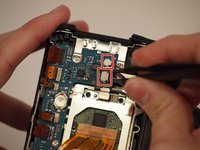
      • Disconnect the small plastic connectors on the top left corner of the motherboard by gripping the small plastic portion of the wire and gently pulling out of the connector.

      • Disconnect the three ribbon connectors along the top.

      • Don't detach the connectors underneath or the ribbon connectors with the foam block, as these will be removed later.

      FixBotに聞いてみる

      コメントを追加

    10. Canon EOS Rebel T6i Flash Assembly Replacement: 手順 10、 2の画像 1 Canon EOS Rebel T6i Flash Assembly Replacement: 手順 10、 2の画像 2
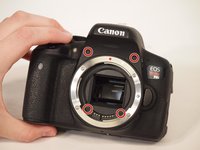
      • Remove the four screws from the front of the camera. There are two screws above the lens mount and two screws inside the lens mount.

      • Remove the four screws from the bottom of the camera.

      FixBotに聞いてみる

      コメントを追加

    11. Canon EOS Rebel T6i Flash Assembly Replacement: 手順 11、 3の画像 1 Canon EOS Rebel T6i Flash Assembly Replacement: 手順 11、 3の画像 2 Canon EOS Rebel T6i Flash Assembly Replacement: 手順 11、 3の画像 3
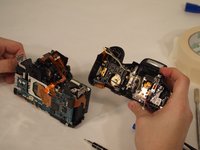
      • Using the plastic opening tool, pry the front of the casing off of the camera.

      • Warning: Electric Shock! Be careful not to touch the terminals of the capacitor (black cylinder). This can cause the capacitor to discharge.

      FixBotに聞いてみる

      コメントを追加

    12. Canon EOS Rebel T6i Flash Assembly Replacement: 手順 12、 2の画像 1 Canon EOS Rebel T6i Flash Assembly Replacement: 手順 12、 2の画像 2
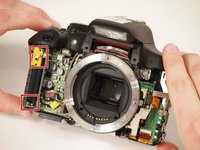
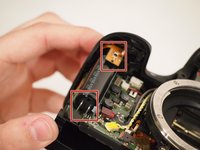
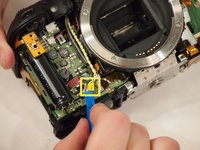
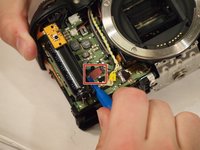
      • Remove the yellow and red connections on the front near the black cylinder (capacitor).

      • The yellow connector will just pop out if pried from the bottom using a plastic opening tool.

      • The red connector will pull out of the casing with either a plastic opening tool or a thin set of tweezers.

      • Warning: Electric Shock! Be careful not to touch the terminals of the capacitor (black cylinder). This can cause the capacitor to discharge.

      FixBotに聞いてみる

      コメントを追加

    13. Canon EOS Rebel T6i Flash Assembly Replacement: 手順 13、 1の画像 1
      • Remove the diopter adjustment knob next to the viewfinder using a JIS #000 screwdriver.

      FixBotに聞いてみる

      コメントを追加

    14. Canon EOS Rebel T6i Flash Assembly Replacement: 手順 14、 2の画像 1 Canon EOS Rebel T6i Flash Assembly Replacement: 手順 14、 2の画像 2
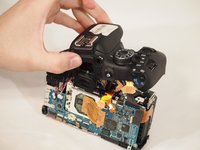
      • Remove the entire upper flash assembly by gently pulling it up and off the camera.

      • The flash assembly is sold as a single piece.

      FixBotに聞いてみる

      コメントを追加

終わりに

To reassemble your device, follow these instructions in reverse order.

キャンセル: このガイドを終了できませんでした。

3 の人々がこのガイドを完成させました。

作成者

12人の作成者と共同で作成されました。

Shane Riding

メンバー登録日: 03/21/18

867 ポイント

4のガイドは作成済み

チーム

University of Memphis, Team S2-G1, Kim Spring 2018 University of Memphis, Team S2-G1, Kim Spring 2018人のメンバー

UM-KIM-S18S2G1

3 メンバー

11のガイドは作成済み

0件のガイドコメント

コメントを追加

統計データ:

過去 24時間: 5

過去 7 日: 11

過去 30 日: 62

今までの合計 4,603