はじめに
If the display on your camera has stopped working or is cracked and otherwise not functional, it will need to be replaced. This guide will show you how.
必要な工具と部品
-
-
-
Lay the camera on its back so that the card/battery door is facing you.
-
Using your fingernail, slide the tab on the battery door up to release the battery door latch.
 FixBotに聞いてみる
-
-
-
Lift the now free card/battery door to reveal the battery compartment.
-
Push the gray lever to the right side so that the battery can be removed and replaced with a new one.
-
-
-
-
-
Turn the camera so that the back is facing to your right.
-
Remove the 5mm JIS #000 screw above the rubber USB port cover.
-
-
-
-
Remove the rubber piece.
-
Unscrew the two screws under the rubber cover to completely remove the rubber cover piece.
-
-
-
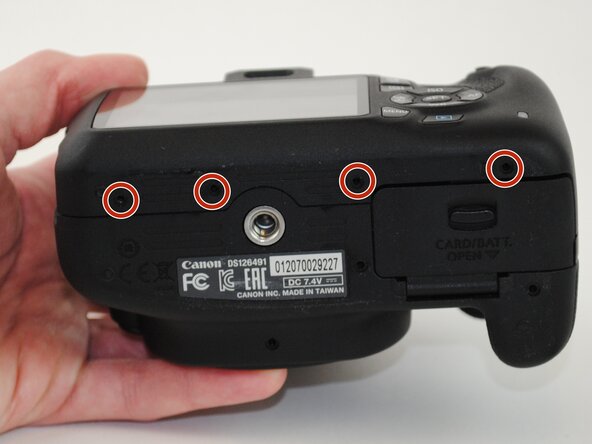
Turn your camera so that the bottom is facing you.
-
Remove the four 5mm JIS #000 screws.
-
-
-
Now turn the camera so that the front is facing towards your right.
-
Remove the two remaining 5mm JIS #000 screws.
-
-
-
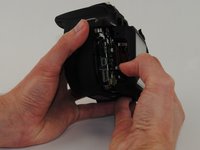
Now that all of the exterior screws have been removed, grip the camera firmly on both sides.
-
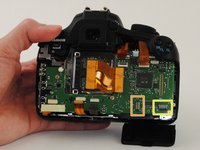
Gently pry the back panel from the main body of the camera.
-
-
-
-
-
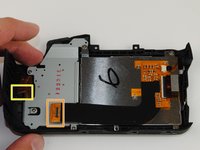
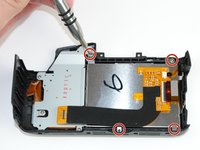
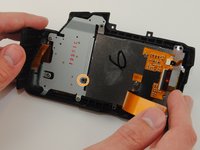
Remove the four silver 4mm JIS #000 screws connecting the LCD screen to the back of the camera.
-
Be sure to lift the ribbon cable to remove the remaining hidden black 4mm JIS #000 screw.
-
-







To reassemble your device, follow these instructions in reverse order.
4 の人々がこのガイドを完成させました。

チーム

USF Tampa, Team 16-4, Wollert Fall 2015 USF Tampa, Team 16-4, Wollert Fall 2015人のメンバー
USFT-WOLLERT-F15S16G4
4 メンバー
18のガイドは作成済み
8件のガイドコメント
Hi, I followed every step and replaced the LCD screen but when turned on the camera, I only got a yellow horizontal line. Do you know what could have gone wrong? Thank you.
Hi, excellent guide but I’ve a problem.
I’m need to buy a lcd display. Do you know where can I buy ? Can you recommend me one store to buy it?
@nickmorales I found the lcd display as well as the connected controller card ar eBay.
Tom Kane
