はじめに
For this guide, we have disassembled a CR-10S Pro so we can better show how to install a BL Touch kit. If you leave your machine assembled, the processes are the same but you’ll need to protect the build surface if you’re going to use it as a workstation. Gravity cannot be disabled so keep that in mind.
Read through these steps before starting:
- Review the entire process before removing one component from your machine. You want to make sure you are comfortable and capable performing the tasks
- Confirm that you have USB connectivity with your machine. You can try to flash the mainboard firmware first. Then, if there is an issue, you still have a working machine and can resolve the USB issue before upgrading.
- Make sure you have the time and tools needed for the upgrade. It’s no fun to get halfway through a task and have to stop because you’re missing something.
必要な工具と部品
-
-
-
Loosen socket head screws securing the X-Axis belt idler using an M3 hex.
-
Push the X-Axis belt idler towards the left to loosen the belt tension.
-
Remove the belt ends from the X-Axis carriage.
-
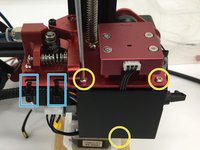
Loosen the fasteners holding the bottom wheel in place using the double sided wrench and M3 hex. Do not fully remove the nut.
-
Remove button screws using an M2 hex.
 FixBotに聞いてみる
-
-
-
Remove the X-Axis assembly from the machine.
-
Cut the zip tie
-
From the back side, remove button head screws using an M2 hex. This will detach the original probe and mount.
-
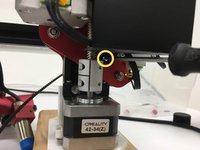
Using the same screws, attach the BL Touch bracket as shown.
-
The probe will be installed as shown but leave loose for now. The wiring harness will plug in easier with the probe removed.
-
The included M3x 6 button head screws will attach the probe.
-
-
-
Cut 2 zip ties.
-
Remove 3 button head screws using M2 hex to remove the daughterboard cover.
-
Unplug the original probe connector. It may have glue on it so pull on the connector, not the wires.
-
-
-
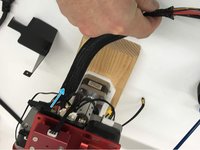
Pull the original probe out from the opposite side to remove it from the loom.
-
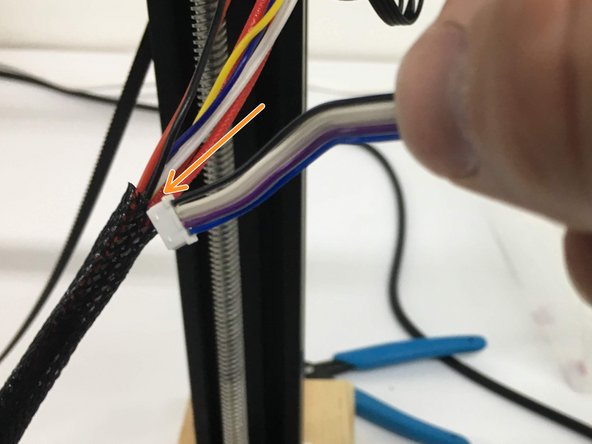
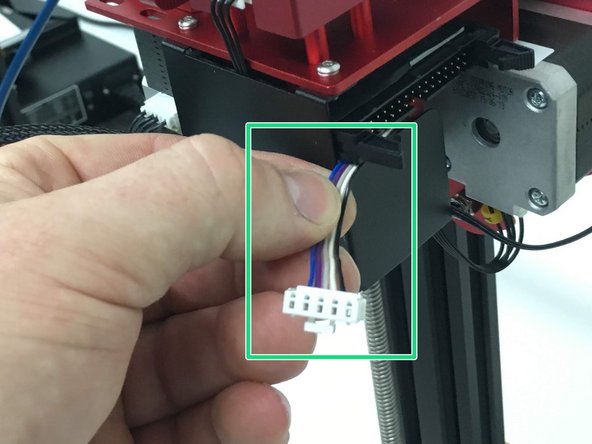
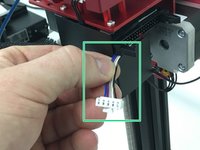
From the daughterboard side, insert the new probe harness with the small plug (probe side) going in first. With the loom still expanded, you should be able to get it completely through.
-
Leave about 1-1.5 inches of the tail end of the probe harness exposed next to the ribbon cable connection and reattach the daughterboard cover.
-
-
-
Tighten button head screws with M2 hex. Start with the top 2 then position the bottom tab, aligning the holes to install the 3rd screw.
-
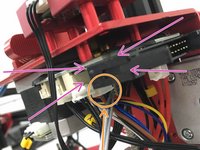
Add new zip ties to hold the cable loom in place.
-
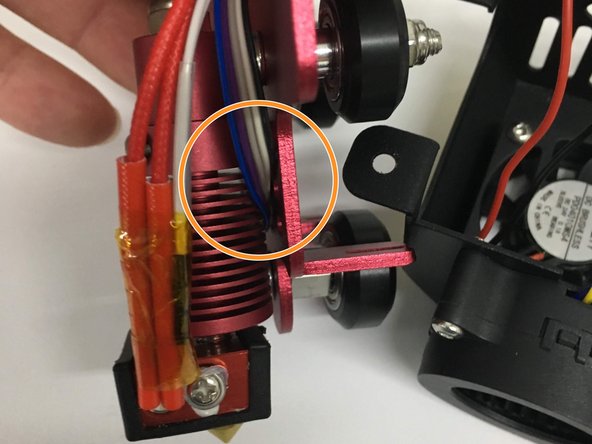
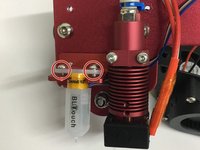
On the hot end/probe side, route the wires behind the hot end and plug into the probe.
-
Install and tighten the button head screws.
-
-
-
-
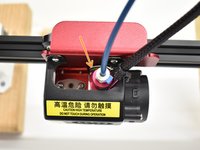
Reinstall a new zip tie.
-
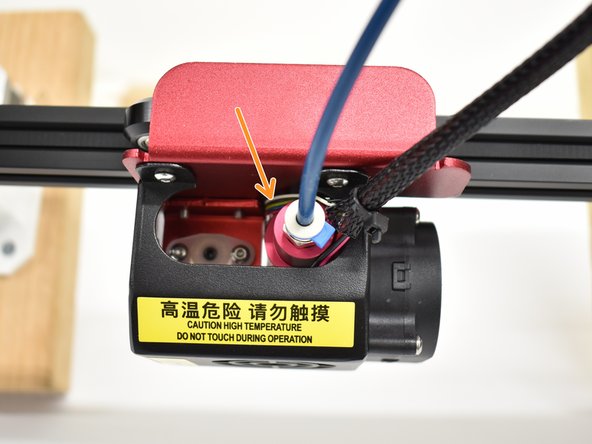
Route BL Touch wires behind hot end as shown.
-
Reattach the X-Carriage
-
Tighten the bottom wheel and reattach the belt on both sides (look at step 1 for images).
-
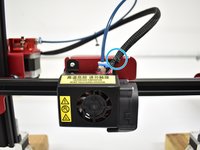
Reattach the front fan cover, paying attention to all wires.
-
Reattach belt ends to the X-Carriage
-
Push X-Axis idler to the right to tighten the belt tension and tighten the socket head screws.
-
-
-
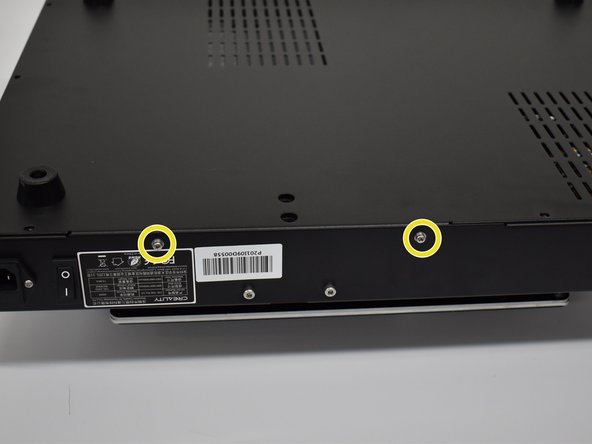
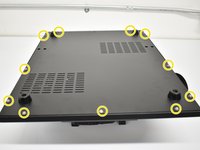
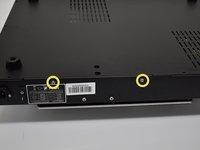
Using a #1 Phillips screwdriver, remove the 11 screws on the bottom and 2 screws on each side for a total of 15. Next, remove the bottom cover.
-
Unplug the original ribbon cable (not shown)
-
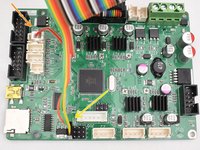
Plug in new connections. For clarity, we only have the new connections shown here.
-
Ribbon Cable (keyed)
-
3 pin black plug into D11 (end row towards SD card slot) Orange wire will face the ribbon cable like in the picture.
-
2 pin white plug into Z+ (connection closest to the ribbon cable) From the same view as the picture, use the right 2 pins.
-
-
-
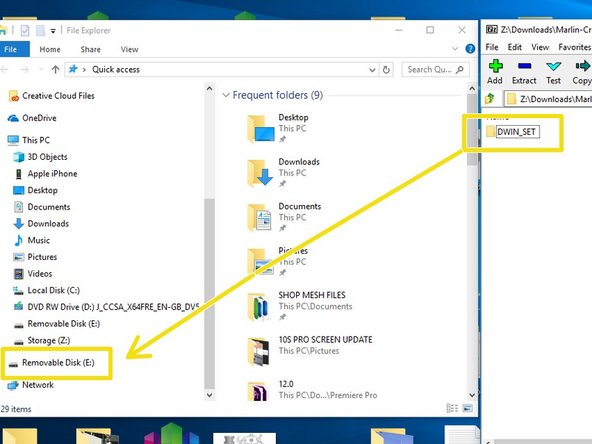
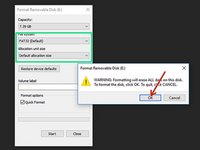
Locate a micro SD card no bigger than 16gb in capacity and format it to FAT 32 / Default allocation size.
-
Download the Screen Files, unzip and locate the directory called "DWIN_SET." These files are also linked in Step 12.
-
Copy/Paste, drag or right click and send DWIN_SET to the formatted SD card.
-
-
-
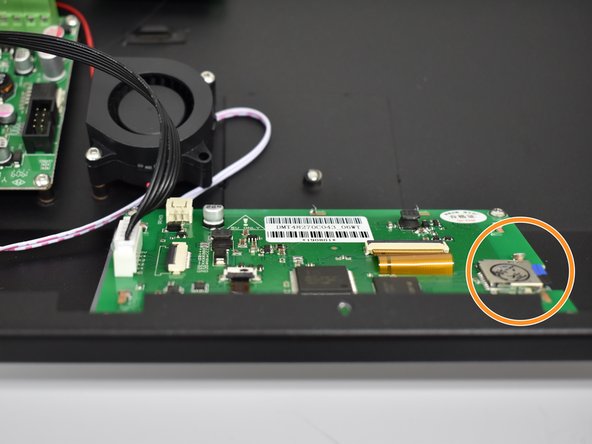
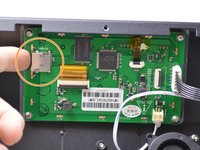
Insert properly configured sd card into the slot on the display.
-
Make sure the power switch is set to "0" then plug the power cable into your machine. Position the machine so you can see the screen and turn the power switch ON.
-
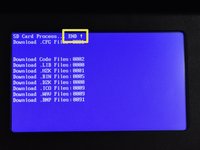
If everything goes correctly, you will see files load, images flash then "END" at the top. See the next step for a video.
-
-
-
If everything goes correctly, you will see files load, images flash then "END" at the top.
-
-
-
Plug in the ribbon cable up top until you feel the clips on both sides click into place, locking the connection.
-
Plug in 5 pin connection for BL Touch Probe. This plug also has a lock when fully seated.
-
-
-
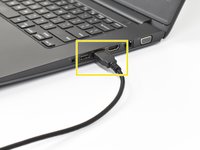
Plug the USB-A side into your computer.
-
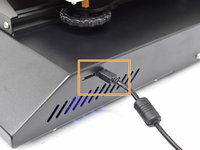
Plug the other side of the USB into your 3D printer.
-
FIRMWARE
-
Go to http://bit.ly/2DIIXNi to find files and firmware flashing info.
-
-
-
The setup process will be the same EXCEPT you do not have set probe height or sensitivity. You just need to set your Z-Offset.
-
-


Look back on earlier steps for images to help with reassembly.
7 の人々がこのガイドを完成させました。

チーム

17件のガイドコメント
My LCD display got blank after turning on my printer once the display was flashed. I thought it would be fixed by the time I uploaded the hex.file but it didn't work. Now my printer is frozen and I dont know what to do. Is there an advice for this situation I will appreciate any help thank you!!
If you purchased the kit from Tiny Machines 3D, you can contact us directly at support@tinymachines3d.com
This guide is for customers but as it is public, it is open to all as reference. If you are having issues beyond that, check wiring.
So, does this mean that you would recommend that no one use your firmware upgrades unless they purchased their CR-10S Pro V2 from you? Unfortunately, I received my V2 before I learned of you guys and the very cool stuff you have done related to this printer (else, I definitely would have purchased from you). I was looking forward to upgrading with your firmware(s).
No, we don’t mean this at all. We want people to understand that there are some differences between our firmware and stock and the configuration outlined in the guide must be followed for the firmware to work correctly.