メインコンテンツにスキップ
リペアコミュニティに参加 - アカウントの作成

Bose Soundlink Flex Driver Replacement

必要な工具と部品

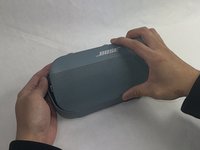
    1. Bose Soundlink Flex Driver Replacement, Grille: 手順 1、 1の画像 1
      • Use a heat gun to warm up the device.

      • This will allow for an easier removal of the grille and prevent damage to the device during the replacement. If you do not have access to a heat gun, a hair dryer works as well.

      FixBotに聞いてみる

      コメントを追加

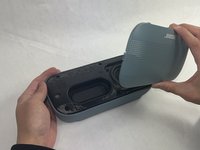
    2. Bose Soundlink Flex Driver Replacement: 手順 2、 1の画像 1
      • Use an iFixit opening tool to pop off the eight clips on the grille.

      • Be patient and do not rush this process as you may otherwise damage the device.

      FixBotに聞いてみる

      コメントを追加

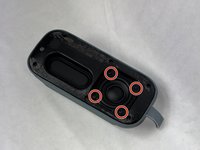
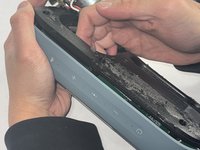
    3. Bose Soundlink Flex Driver Replacement: 手順 3、 2の画像 1 Bose Soundlink Flex Driver Replacement: 手順 3、 2の画像 2
      • Once the clips have been released, the only thing holding the grille on is glue.

      • Apply minimal force and the grille should pop right off the device.

      • Reheat the device to warm up the glue if there is difficulty in removing.

      FixBotに聞いてみる

      コメントを追加

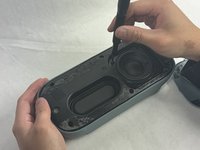
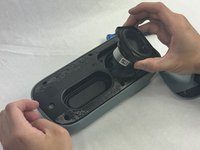
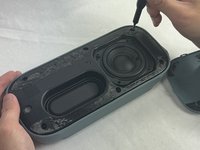
    1. Bose Soundlink Flex Driver Replacement, Driver: 手順 4、 3の画像 1 Bose Soundlink Flex Driver Replacement, Driver: 手順 4、 3の画像 2 Bose Soundlink Flex Driver Replacement, Driver: 手順 4、 3の画像 3
      • Remove the four 2.3 mm screws holding the driver in place using a TR8 Torx screwdriver.

      • Lift the driver out, being cautious of the wires still connected to the device.

      FixBotに聞いてみる

      コメントを追加

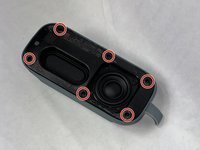
    2. Bose Soundlink Flex Driver Replacement: 手順 5、 3の画像 1 Bose Soundlink Flex Driver Replacement: 手順 5、 3の画像 2 Bose Soundlink Flex Driver Replacement: 手順 5、 3の画像 3
      • Remove the six 2.3 mm screws around the edge with a TR8 Torx screwdriver.

      • Pull the back panel off exposing the motherboard.

      FixBotに聞いてみる

      コメントを追加

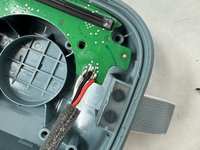
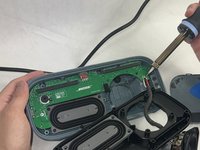
    3. Bose Soundlink Flex Driver Replacement: 手順 6、 2の画像 1 Bose Soundlink Flex Driver Replacement: 手順 6、 2の画像 2
      • Desolder the joints that are connecting the speaker to the motherboard.

      • Solder the new speaker with the wire color in the same order.

      • Be cautious when removing and adding the solder to not damage the motherboard or burn yourself.

      FixBotに聞いてみる

      コメントを追加

終わりに

To reassemble your device, follow these instructions in reverse order.

キャンセル: このガイドを終了できませんでした。

作成者

2人の作成者と共同で作成されました。

Kalvin Lee

メンバー登録日: 03/19/24

625 ポイント

3のガイドは作成済み

チーム

UMass Dartmouth, Team 4-1, Shaddix Spring 2024 UMass Dartmouth, Team 4-1, Shaddix Spring 2024人のメンバー

UMASSD-SHADDIX-S24S4G1

3 メンバー

28のガイドは作成済み

0件のガイドコメント

コメントを追加

統計データ:

過去 24時間: 3

過去 7 日: 19

過去 30 日: 100

今までの合計 1,876