メインコンテンツにスキップ
リペアコミュニティに参加 - アカウントの作成

Asus GL551JW-AH71 RAM Replacement

必要な工具と部品

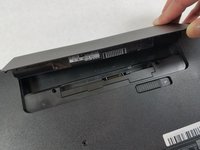
    1. Asus GL551JW-AH71 RAM Replacement, Battery: 手順 1、 1の画像 1
      • Close the device and lay it upside down.

      • Unplug the device and make sure the device is powered off before removing the battery.

      FixBotに聞いてみる

      コメントを追加

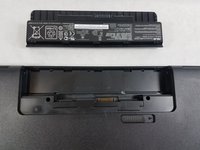
    2. Asus GL551JW-AH71 RAM Replacement: 手順 2、 2の画像 1 Asus GL551JW-AH71 RAM Replacement: 手順 2、 2の画像 2
      • Move the battery eject button to the right. The battery will be ejected.

      FixBotに聞いてみる

      コメントを追加

    3. Asus GL551JW-AH71 RAM Replacement: 手順 3、 2の画像 1 Asus GL551JW-AH71 RAM Replacement: 手順 3、 2の画像 2
      • Grab the battery and remove it from the device.

      FixBotに聞いてみる

      コメントを追加

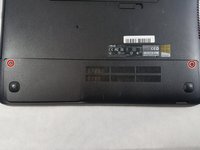
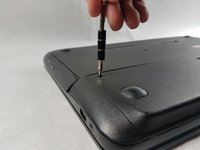
    1. Asus GL551JW-AH71 RAM Replacement, RAM: 手順 4、 2の画像 1 Asus GL551JW-AH71 RAM Replacement, RAM: 手順 4、 2の画像 2
      • Using a Phillips #00 screwdriver, remove the two 11mm screws that hold the access panel in place.

      FixBotに聞いてみる

      コメントを追加

    2. Asus GL551JW-AH71 RAM Replacement: 手順 5、 1の画像 1
      • Remove the access panel by lifting it up.

      FixBotに聞いてみる

      コメントを追加

    3. Asus GL551JW-AH71 RAM Replacement: 手順 6、 3の画像 1 Asus GL551JW-AH71 RAM Replacement: 手順 6、 3の画像 2 Asus GL551JW-AH71 RAM Replacement: 手順 6、 3の画像 3
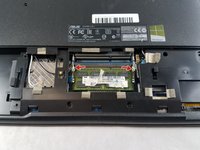
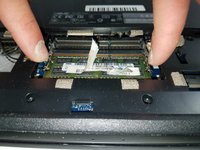
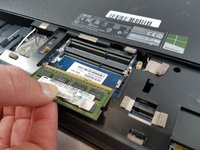
      • Locate the tabs holding the RAM chip in place.

      • Push the tabs in an outward direction from the RAM and the RAM will be released.

      • Gently remove the RAM from the motherboard.

      FixBotに聞いてみる

      コメントを追加

終わりに

To reassemble your device, follow these instructions in reverse order.

キャンセル: このガイドを終了できませんでした。

2 の人々がこのガイドを完成させました。

作成者

2人の作成者と共同で作成されました。

William Kelley

メンバー登録日: 03/20/19

1,035 ポイント

7のガイドは作成済み

チーム

UMass Dartmouth, Team S8-G3, Bailey Spring 2019 UMass Dartmouth, Team S8-G3, Bailey Spring 2019人のメンバー

UMASSD-BAILEY-S19S8G3

4 メンバー

16のガイドは作成済み

0件のガイドコメント

コメントを追加

統計データ:

過去 24時間: 0

過去 7 日: 3

過去 30 日: 13

今までの合計 475