メインコンテンツにスキップ
リペアコミュニティに参加 - アカウントの作成

Apple Studio Display M7649 Inverter Replacement

必要な工具と部品

  1. Apple Studio Display M7649 Inverter Replacement, Stand: 手順 1、 2の画像 1 Apple Studio Display M7649 Inverter Replacement, Stand: 手順 1、 2の画像 2
    • Lay the display facing down with the stand away from you.

    • Remove the three size 2.0 hex screws on the swing arm and remove the swing arm as well as the plastic shield under it.

    FixBotに聞いてみる
  2. Apple Studio Display M7649 Inverter Replacement, Panels: 手順 2、 1の画像 1
    • Remove the size 2.5 hex screws from each corner that connects the panels to the display and remove them.

    FixBotに聞いてみる
  3. Apple Studio Display M7649 Inverter Replacement: 手順 3、 1の画像 1
    • Rotate the display so the legs of the display are now facing you

    • Grip the top of the clear panel and lift it upwards, and pull the ADC cable through the hole.

    FixBotに聞いてみる
  4. Apple Studio Display M7649 Inverter Replacement: 手順 4、 1の画像 1
    • Remove the grey back panel by lifting the bottom and pulling the ADC cable through the hole.

    FixBotに聞いてみる
  5. Apple Studio Display M7649 Inverter Replacement, Metal EMI Shield: 手順 5、 1の画像 1
    • The next layer will be a shiny metal panel, which might have some stickers. Make sure to remove these stickers.

    FixBotに聞いてみる
  6. Apple Studio Display M7649 Inverter Replacement: 手順 6、 1の画像 1
    • Now locate and remove the lone Phillips screw holding the EMI shield to the display

    FixBotに聞いてみる
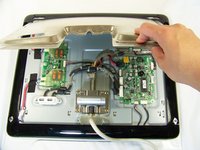
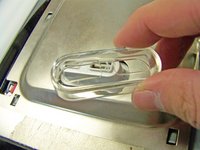
  7. Apple Studio Display M7649 Inverter Replacement: 手順 7、 2の画像 1 Apple Studio Display M7649 Inverter Replacement: 手順 7、 2の画像 2
    • Now that the screw has been removed, slide the panel towards your body and lift it out.

    • You may need to remove the clear USB port cover to remove the metal EMI shield.

    FixBotに聞いてみる
  8. Apple Studio Display M7649 Inverter Replacement, Inverter: 手順 8、 1の画像 1
    • Remove these three screws holding the board to the display

    FixBotに聞いてみる
  9. Apple Studio Display M7649 Inverter Replacement: 手順 9、 1の画像 1
    • Remove these five cables connection the inverter to the backlights and logic board.

    • Taking note where they connect to for reassembly

    FixBotに聞いてみる
  10. Apple Studio Display M7649 Inverter Replacement: 手順 10、 1の画像 1
    • Remove and replace the inverter

    FixBotに聞いてみる
終わりに

To reassemble your device, follow these instructions in reverse order.

5 の人々がこのガイドを完成させました。

作成者

4人の作成者と共同で作成されました。

Andrew Tsao

メンバー登録日: 01/19/10

186 ポイント

5のガイドは作成済み

チーム

Cal Poly, Team 3-20, Maness Winter 2010 Cal Poly, Team 3-20, Maness Winter 2010人のメンバー

CPSU-MANESS-W10S3G20

4 メンバー

23のガイドは作成済み

0件のガイドコメント

コメントを追加

統計データ:

過去 24時間: 4

過去 7 日: 21

過去 30 日: 131

今までの合計 7,750