メインコンテンツにスキップ

ASUS ZenPad S 8.0 Front Facing Camera Replacement

必要な工具と部品

  1. ASUS ZenPad S 8.0 Front Facing Camera Replacement, Rear Cover Removal: 手順 1、 3の画像 1 ASUS ZenPad S 8.0 Front Facing Camera Replacement, Rear Cover Removal: 手順 1、 3の画像 2 ASUS ZenPad S 8.0 Front Facing Camera Replacement, Rear Cover Removal: 手順 1、 3の画像 3
    • if present, remove the MicroSD card before disassembly. Failure to remove could lead to damage to the MicroSD card , rear cover, or MicroSD card slot.

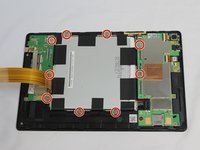
    • Use the plastic tool to pry between the silver bezel and the back case

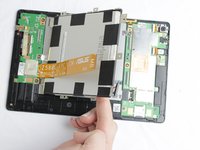
    • Work the tool around the device to free the back case

  2. ASUS ZenPad S 8.0 Front Facing Camera Replacement: 手順 2、 2の画像 1 ASUS ZenPad S 8.0 Front Facing Camera Replacement: 手順 2、 2の画像 2
    • Remove the ribbon cables by lifting up the white retaining flap on the ZIF connectors, then pulling the ribbon cable away.

    • Do not kink the ribbon cables as they can break easily

  3. ASUS ZenPad S 8.0 Front Facing Camera Replacement: 手順 3、 3の画像 1 ASUS ZenPad S 8.0 Front Facing Camera Replacement: 手順 3、 3の画像 2 ASUS ZenPad S 8.0 Front Facing Camera Replacement: 手順 3、 3の画像 3
    • Remove the battery connector by prying it up away from the device using 2 plastic pry tools

  4. ASUS ZenPad S 8.0 Front Facing Camera Replacement: 手順 4、 2の画像 1 ASUS ZenPad S 8.0 Front Facing Camera Replacement: 手順 4、 2の画像 2
    • Remove all 9 of the 1.5mm #00 Philips screws

    • Gently lift the battery out of the device

    • Use an opening pick or similar tool to separate the adhesive on the bottom and top of the battery.

  5. ASUS ZenPad S 8.0 Front Facing Camera Replacement, Front Facing Camera: 手順 5、 3の画像 1 ASUS ZenPad S 8.0 Front Facing Camera Replacement, Front Facing Camera: 手順 5、 3の画像 2 ASUS ZenPad S 8.0 Front Facing Camera Replacement, Front Facing Camera: 手順 5、 3の画像 3
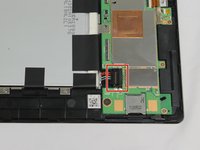
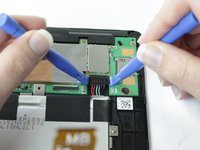
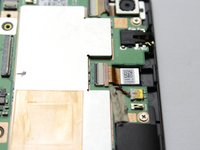
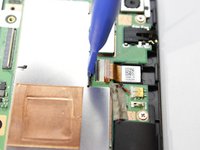
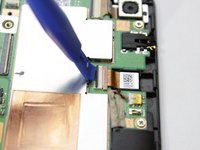
    • Use a plastic opening tool to lift the black retaining flap on the ZIF Connector

  6. ASUS ZenPad S 8.0 Front Facing Camera Replacement: 手順 6、 1の画像 1
    • Use a tweezers to lift out the camera

    • If you lifted the latch for the ribbon cable then it should come out with little resistance.

終わりに

To reassemble your device, follow these instructions in reverse order.

作成者

1人の作成者と共同作成されました。

John Astfanous

メンバー登録日: 10/04/16

987 ポイント

3のガイドは作成済み

チーム

USF Tampa, Team 2-2, Cagle Fall 2016 USF Tampa, Team 2-2, Cagle Fall 2016人のメンバー

USFT-CAGLE-F16S2G2

4 メンバー

5のガイドは作成済み

0 件のコメント

コメントを追加

統計データ:

過去 24時間: 0

過去 7 日: 0

過去 30 日: 4

今までの合計 1,328