メインコンテンツにスキップ

3DR Iris Plus Quadcopter Electronic Speed Controller (ESC) and Power Distribution Board (PDB) Replacement

必要な工具と部品

  1. 3DR Iris Plus Quadcopter Electronic Speed Controller (ESC) and Power Distribution Board (PDB) Replacement, Battery: 手順 1、 1の画像 1
    • Power off the drone by holding down the power button.

    • Remove the battery by disconnecting it from the main battery connector.

    • Press the power button again to ensure all electricity is discharged.

    • This step is imperative as it is dangerous to handle drone components with a running current!

  2. 3DR Iris Plus Quadcopter Electronic Speed Controller (ESC) and Power Distribution Board (PDB) Replacement, Gimbal: 手順 2、 3の画像 1 3DR Iris Plus Quadcopter Electronic Speed Controller (ESC) and Power Distribution Board (PDB) Replacement, Gimbal: 手順 2、 3の画像 2 3DR Iris Plus Quadcopter Electronic Speed Controller (ESC) and Power Distribution Board (PDB) Replacement, Gimbal: 手順 2、 3の画像 3
    • If your drone is equipped with it, remove the video transmitter.

    • Disconnect all cables from the gimbal.

    • If your drone has neither the gimbal or video transmitter, you can skip this step.

  3. 3DR Iris Plus Quadcopter Electronic Speed Controller (ESC) and Power Distribution Board (PDB) Replacement: 手順 3、 2の画像 1 3DR Iris Plus Quadcopter Electronic Speed Controller (ESC) and Power Distribution Board (PDB) Replacement: 手順 3、 2の画像 2
    • Unscrew the 16 mm screw attaching the gimbal mount to the body of the drone using the 3 mm Hex screwdriver/key.

  4. 3DR Iris Plus Quadcopter Electronic Speed Controller (ESC) and Power Distribution Board (PDB) Replacement: 手順 4、 2の画像 1 3DR Iris Plus Quadcopter Electronic Speed Controller (ESC) and Power Distribution Board (PDB) Replacement: 手順 4、 2の画像 2
    • Rotate the drone 180 degrees.

    • Unscrew the other 16mm gimbal mount screw using the 3 mm Hex screwdriver/key.

  5. 3DR Iris Plus Quadcopter Electronic Speed Controller (ESC) and Power Distribution Board (PDB) Replacement: 手順 5、 1の画像 1
    • Remove the gimbal mount from the body of the drone.

  6. 3DR Iris Plus Quadcopter Electronic Speed Controller (ESC) and Power Distribution Board (PDB) Replacement, Bottom Shell: 手順 6、 2の画像 1 3DR Iris Plus Quadcopter Electronic Speed Controller (ESC) and Power Distribution Board (PDB) Replacement, Bottom Shell: 手順 6、 2の画像 2
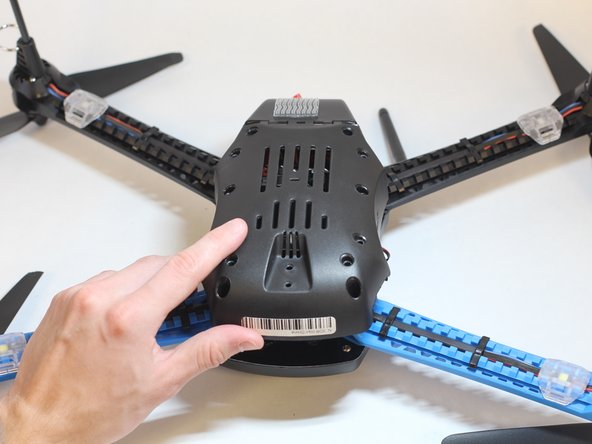
    • Remove the eight 11mm screws attaching the underbody of the drone using the 2mm Hex screwdriver/key.

  7. 3DR Iris Plus Quadcopter Electronic Speed Controller (ESC) and Power Distribution Board (PDB) Replacement: 手順 7、 3の画像 1 3DR Iris Plus Quadcopter Electronic Speed Controller (ESC) and Power Distribution Board (PDB) Replacement: 手順 7、 3の画像 2 3DR Iris Plus Quadcopter Electronic Speed Controller (ESC) and Power Distribution Board (PDB) Replacement: 手順 7、 3の画像 3
    • Remove the two larger, 12mm screws attached to the Go Pro mount using the 3mm Hex screwdriver/key.

    • Lift to remove the mount.

  8. 3DR Iris Plus Quadcopter Electronic Speed Controller (ESC) and Power Distribution Board (PDB) Replacement: 手順 8、 3の画像 1 3DR Iris Plus Quadcopter Electronic Speed Controller (ESC) and Power Distribution Board (PDB) Replacement: 手順 8、 3の画像 2 3DR Iris Plus Quadcopter Electronic Speed Controller (ESC) and Power Distribution Board (PDB) Replacement: 手順 8、 3の画像 3
    • Feed both wires through the grill of the bottom shell.

    • Lift to remove the shell.

    • There are two cables tethering the shell to the body of the drone. It is difficult and unnecessary to remove them. Simply lay the shell to the side.

  9. 3DR Iris Plus Quadcopter Electronic Speed Controller (ESC) and Power Distribution Board (PDB) Replacement, Electronic Speed Controller (ESC) and Power Distribution Board (PDB): 手順 9、 3の画像 1 3DR Iris Plus Quadcopter Electronic Speed Controller (ESC) and Power Distribution Board (PDB) Replacement, Electronic Speed Controller (ESC) and Power Distribution Board (PDB): 手順 9、 3の画像 2 3DR Iris Plus Quadcopter Electronic Speed Controller (ESC) and Power Distribution Board (PDB) Replacement, Electronic Speed Controller (ESC) and Power Distribution Board (PDB): 手順 9、 3の画像 3
    • Unscrew the four 4mm screws that hold the board to the central drone assembly using the 2mm Hex screwdriver/key.

    • Desolder the 12 motor wires.

    • For more information on soldering and desoldering wires, please visit the How to Solder and Desolder Connections guide.

終わりに

To reassemble your device, follow these instructions in reverse order.

ある他の人がこのガイドを完成しました。

作成者

2人の作成者と共同で作成されました。

Evan Witulski

メンバー登録日: 02/10/20

349 ポイント

3のガイドは作成済み

チーム

Cal Poly, Team S7-G5, Regan Winter 2020 Cal Poly, Team S7-G5, Regan Winter 2020人のメンバー

CPSU-REGAN-W20S7G5

5 メンバー

9のガイドは作成済み

0 件のコメント

コメントを追加

統計データ:

過去 24時間: 1

過去 7 日: 6

過去 30 日: 20

今までの合計 561