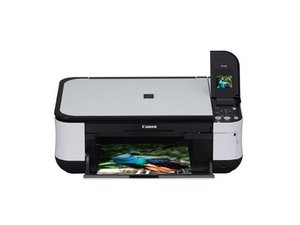
プリンターの電源が入らない
電源ボタンを押しても、プリンターの電源が入らない場合
プリンターがコンセントに接続されていない
電源ケーブルが壁のコンセントとプリンター背面の双方にしっかりと差し込まれているか確認してください。
壁のコンセントの不具合
別のコンセントにプリンターを接続してください。
プリンターのリセットが必要
プリンターを壁のコンセントから抜き、3分待ってから再度差し込んでください。
マザーボードの不具合
マザーボードを交換する必要があります。マザーボードの取り付け修理ガイドを参照してください。
電源ユニットの不具合
電源ユニットを交換する必要があります。
印刷できない
印刷コマンドを送信しても、プリンターが印刷を開始しない場合
パソコンに接続されていない
USBケーブルがパソコンとプリンター背面の双方にしっかりと差し込まれているか確認してください。
用紙切れ
プリンターの給紙トレイに用紙が入っているか確認してください。
プリンターのリセットが必要
プリンターを壁のコンセントから抜き、3分待ってから再度差し込んでください。
インク切れ
現在のインクカートリッジを新しいものに交換してください。
インクカートリッジが正しく装着されていない
スキャンユニットのカバーを開け、インクカートリッジの固定カバーをカチッと音がするまでしっかりと押し込んでください。
プリンタードライバーがインストールされていない
メーカーのページこちらにアクセスし、デバイスの最新ドライバーをダウンロードしてください。
印刷またはスキャンの品質が悪い
印刷やスキャンはできるが、結果が不十分な場合
印刷品質の設定が低い
操作パネルのメニューボタンを使用して、印刷品質を希望の設定に変更してください。
インクの汚れ
スキャンユニットを開けてインクカートリッジを取り外してください。インクカートリッジの底面を清掃してから、正しく元の位置に挿入してください。
色が正しく印刷されない
操作パネルのメニューボタンを使用して、クリーニングを選択してください。
スキャンした画像に不要な背景が入る
スキャナーカバーの取り付け修理ガイドを使用して、スキャナーカバーを交換してください。
頻繁に紙詰まりが起きる
何を印刷しても、常に紙詰まりが発生する場合
用紙トレイに入れすぎている
用紙を積載制限ライン以下まで減らしてください。
リアトレイまたは排紙口付近に異物がある
プリンター内からすべての異物を取り除いてください。
用紙が厚すぎる、または薄すぎる
現在の用紙を、17ポンド(64 gsm)以上、28ポンド(105 gsm)以下の用紙に交換してください。
用紙トレイ内で紙がカールしている
紙のカールを直してから、再度トレイにセットしてください。
LCD画面が何も表示されない
LCD画面の電源が入らない場合
プリンターの電源が入っていない
プリンターをコンセントに差し込み、電源を入れてください。
LCD画面がスクリーンセーバーモードになっている
操作パネルのボタンを押してください。
ボタンの故障
ボタンの取り付け修理ガイドを使用して、ボタンを交換してください。
LCD画面の故障
LCD画面の取り付け修理ガイドを使用して、LCD画面を交換してください。
前面データポート(USBおよびメモリカードリーダー)が機能しない
フラッシュドライブやメモリカードリーダーを接続しても、プリンターが認識しない場合
フラッシュドライブまたはメモリカードの故障
メモリデバイスをパソコンに接続し、認識されるか試してください。認識されない場合、メモリデバイスが故障しているため、新しいものが必要です。
フラッシュドライブの破損
パソコンではフラッシュドライブが認識されるのにプリンターで認識されない場合は、フラッシュドライブを再フォーマットするか、新しいものに交換してください。
メモリデバイスが反応しない
プリンターからメモリデバイスを抜き、3分待ってから再度差し込んでください。
データポートの故障
データポートの取り付け修理ガイドを使用して、データポートを交換してください。

チーム

Cal Poly, Team 19-41, Regan Winter 2013 Cal Poly, Team 19-41, Regan Winter 2013人のメンバー
CPSU-REGAN-W13S19G41
4 メンバー
72のガイドは作成済み

5 件のコメント
1 of 2
Here's a suggestion for cleaning out the printhead. I did this on a Canon Pixma MP630 that was showing error B200. It didn't fix the problem, so I can't be sure this is good advice, but it did clean a lot of ink out of the printhead.
Open the lid, remove all of the ink cartridges and lift the grey lever. Slide the printhead assembly out.
Set up a work area with several layers of newspaper because it gets messy! Unscrew the two silver Phillips-head screws holding the postage-stamp-sized printhead "puck" onto the plastic structure and prise them apart gently at the end opposite the orange flat flex cable. Remove the grey rubbery gasket and clean it in isopropyl alcohol.
Pour some isopropyl alcohol into a shallow tray slightly larger than the printhead element and hold the printhead puck in it, with the printing side downwards and the ink feed holes upwards.
Get a one foot length of plastic tube and slide something soft and rubbery over one end so it will make an airtight seal with the ...
KrisBlueNZ - 返信 共有
2 of 2
... top surface of the printhead puck. I used a small rubbery "collar" from the tray suspension system in a CD drive, but you could use a rubber washer, a rubber grommet, or anything that will "kiss" the surface and form a good seal.
For each ink hole, press the tube and grommet around the hole, and suck on the tube. This will suck the isopropyl alcohol from the tray, up through the printhead puck, and into the bottom part of the tube. Stop sucking, slide the grommet off the edge of the puck and blow the crap out. Slide it back and repeat until you see bubbles coming through the alcohol in the tube, showing that air is able to flow through the puck. Repeat for the other holes.
Clean up both sides (lots of toilet paper is good here), refit the gasket and reassemble. You'll need to run a few pages through it to clear the alcohol out.
KrisBlueNZ
"That's a nasty clog!" - Groundskeeper Willie
KrisBlueNZ - 返信 共有
Hi. I dont have the wall outlet piece. Is
there anyway that i could turn it on without it.
Creasie beal - 返信 共有
Anyone know how to make the copy complete. All we get is a portion of the page we need to copy.
Grace - 返信 共有
Can you tell me how to solve red lines across the a photo copy. Paxma MP480 printer.
dajo88 - 返信 共有