はじめに
As the old saying goes, laymen are overwhelmed by the fun, while professionals try to find out the trick. Apple has impressed the repair industry again with its new iPhone series. What does the new design mean to our repair work?
ビデオの概要
-
-
Remove the two pentalobe screws at the bottom edge of the phone. Heat with the Hot Air Gun along edges of the screen evenly for 1 minute to soften up the waterproof seals.
-
Press the suction cup firmly onto the screen. Hold the phone with one hand and pull the ring-pull of the suction cup with the other hand.
-
When the screen is lifted, there should be a tiny gap. Insert a plastic pry piece into the gap to get it stuck in the middle. Insert a new pry piece into the gap and slide along edges of the screen to free the screen from the rear housing.
-
-
-
iPhone 11 Pro has a bigger battery capacity than iPhone X series. We can see clearly that the battery is a little thicker.
-
-
-
-
Continue to remove the connector bracket.
-
Disconnect the battery and remove the screen. The lack of the 3D touch layer of iPhone 11 Pro makes the screen slightly slimmer. The newly added bracket protection on the bonding area of the screen also increases the difficulty of screen repair.
-
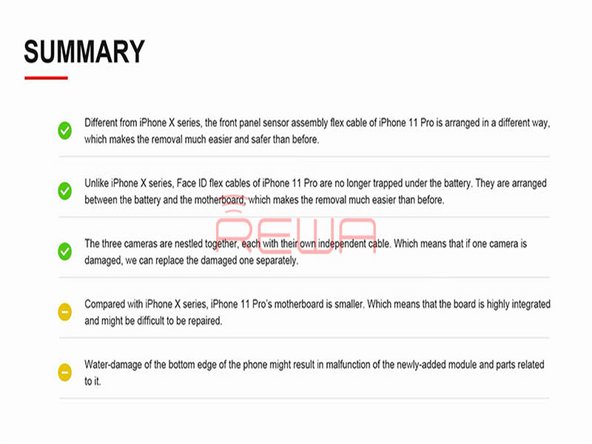
Unlike iPhone X series, Face ID flex cables of iPhone 11 Pro are no longer trapped under the battery. They are arranged between the battery and the motherboard. Which makes the removal much easier than before
-
-
-
Continue to disconnect the rest flex cables and take out the motherboard.
-
Remove the Face ID parts. iPhone 11 Pro’s Face ID parts is designed just like iPhone X series. So it can still be hardly repaired once malfunctioned
-
-
-
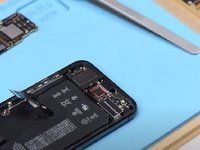
Continue to remove the shielding cover on the newly added module. We can see that there are four flex cables connected to the module.
-
One is the flex cable of the Taptic Engine. One is the flex cable of the battery. One is the flex cable of the wireless charging coil. And one is the flex cable of the speaker.
-


8 件のコメント
Are there any kits where you can replace the apple logo with a backlit apple logo?
What do you mean by a backlit Apple logo? I know there are tricks for a glowing apple logo.
Phryne -
yes, that exactly!
But for the iPhone 11.
Thinking about the difference between the x and the 11, is the battery. Will a kit for the x work on the 11 or different battery connectors?