メインコンテンツにスキップ

iPhone 7 の分解

英語
日本語

手順 12を翻訳中

手順12
iPhone 7 Teardown: 手順 0、 2の画像 1 iPhone 7 Teardown: 手順 0、 2の画像 2
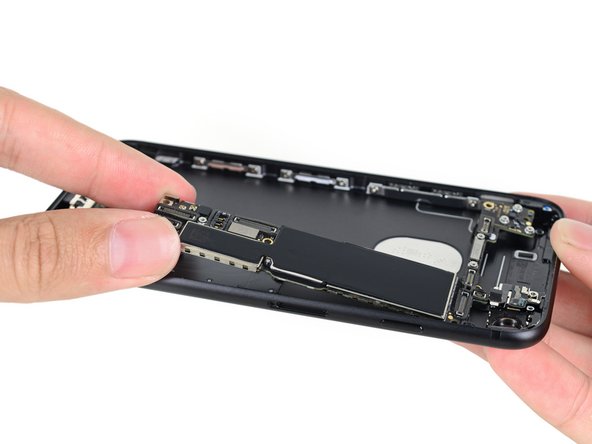
  • We quickly remove the logic board to take a closer look at some silicon.

  • But not before we do a quick side-by-side comparison with the iPhone 7 Plus logic board. The standard 7 and 7 Plus logic boards are surprisingly similar, despite the noticeable difference in housing size.

  • If you look closely, you'll see minor differences in connector sizes and locations, post holes, and screw locations.

  • While it is clear Apple didn't reinvent the wheel here, they did need to make some accommodations for the demands of the iPhone 7 Plus hardware on the board.

シリコンを間近で確認するため、速やかにロジックボードへ作業を移しましょう。

iPhone 7 Plus のロジックボードと比較するために並列してみる前に、7 と 7 Plusのロジックボードはサイズこそは大きな違いがあるものの、驚くほど似ていることに気がつきます。

詳細に見てみるとコネクターのサイズと位置、柱穴やネジの位置にわずかな違いがみられます。

Appleは一から新しいボードを作り直さなかったのは明らかですが、iPhone 7 Plusのハードウェアをボードに搭載するために幾つかの調節が必要だったようです。

クリエイティブコモンズのオープンソース著作権のもと、あなたの投稿は著作権の対象となります