はじめに
Earlier this week, we spent a day getting to know Microsoft's newest Surface device, the Studio. Today, in response to overwhelming public outcry (a few folks asked about it on our YouTube channel), we're cracking open its hockey puck co-star, the Surface Dial. Brace yourselves, "turn it up to 11" jokes are coming.
Don't miss out on the next device dissection. Follow us on Facebook, Instagram, or Twitter.
必要な工具と部品
ビデオの概要
-
-
Some features of the Surface Dial:
-
Bluetooth 4.0 LE
-
Compatible with Surface Studio, Surface Pro 4, Surface Book, and any PC running Windows 10 Anniversary Update
-
Two AAA batteries
-
Two input methods: spinny and clicky
-
Sticky rubber foot to grip onto the Surface Studio glass
-
-
-
The rubber foot has no visible fasteners. In fact, it has invisible fasteners—it's held on with magnets, and pops off and back on with no glue, tools, or fatiguable plastic clips. Sweet!
-
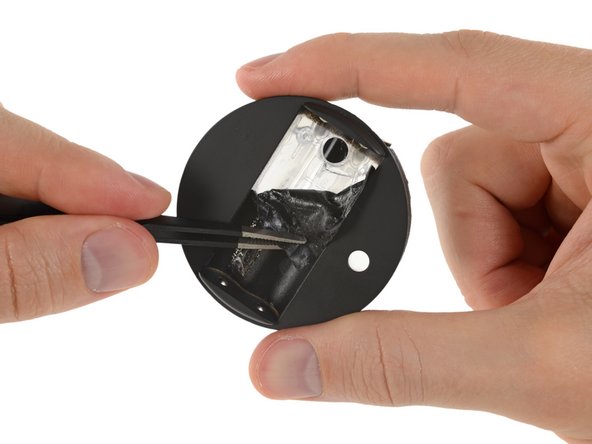
Inside are the two AAA batteries powering the puck—the included Duracells aren't rechargeable, but you could replace them with your own rechargeable cells when the time comes.
-
A sync button makes the only other feature in the Dial's entryway.
-
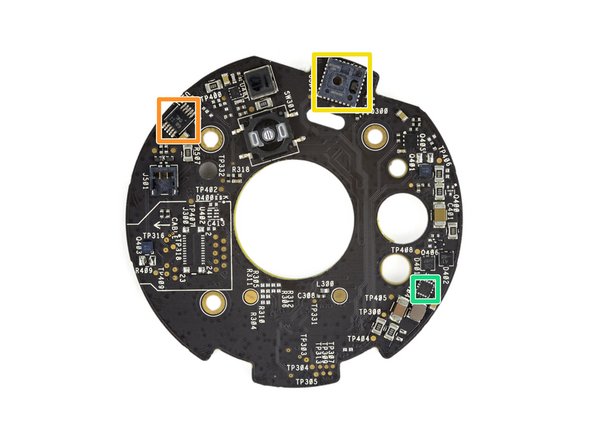
Microsoft hid the Dial's model number, 1756, behind the batteries.
-
-
-
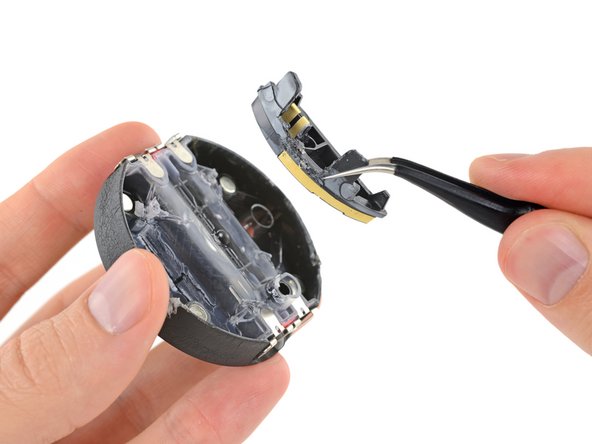
This Dial's solid construction is great (especially if it ends up sliding off your Surface) but also makes it a challenge to get into...
-
Some aggressive prying led to aggressive snapping which led to aggressive... well, let's just say the midframe didn't come out without a fight.
-
Removing the midframe/battery holder compartment, we get a peek at a sweet bearing, and some silicon!
-
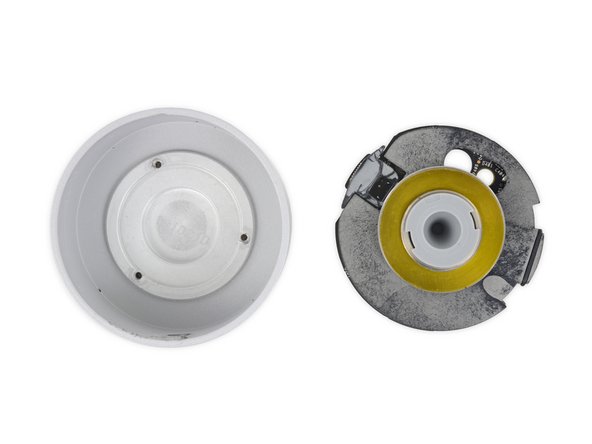
We also get to pop this (presumably Bluetooth) antenna off of the battery compartment.
-
Along for the ride are four magnets, evenly spaced around the battery frame. Not only do they secure that sweet magnetic cover, they also give the Dial a little extra grip on the Studio's screen to combat the ol' downward slide.
-
-
-
-
To get in any further, we have to pop the bearing apart. It's a little greasy, and features a plastic cage for the ball bearings—surely a special recipe designed to give the knob that luxurious, high-end slightly-resistant feel to it.
-
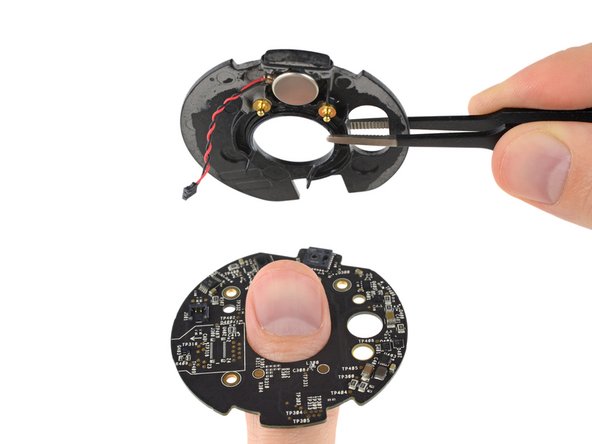
Lifting off the midframe reveals two springy posts opposite the switch. These springs even out the pressure so, no matter where you press, it feels the same.
-
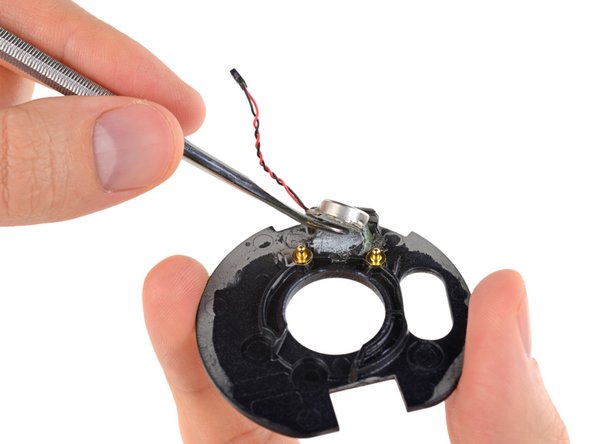
We also scrape out a pancake vibration motor, responsible for the buzzy feedback you get when spinning or clicking the Dial.
-
The bit of the midframe holding the vibrator has a rubber O-ring, presumably for vibration dampening.
-
-
-
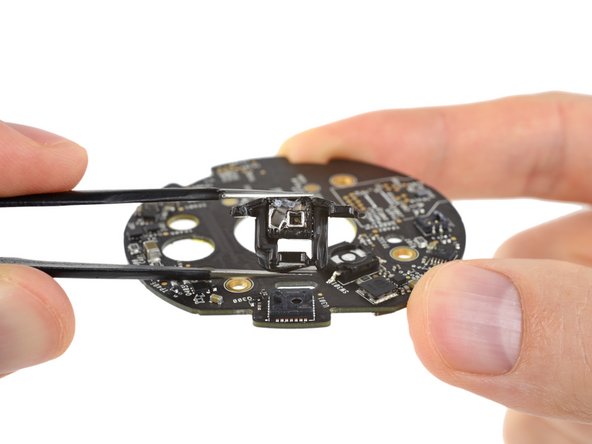
And now for the grand finale, the hardware responsible for all of the Surface Dial's many features. The clicky and the spinny.
-
This microswitch handles the Dial's click function.
-
As for the spinny function, this component looks awfully similar to the optical sensor in the Nest, that worked just like an optical mouse pointed at the inside wall of the metal casing.
-
Unlike in the Nest, we find a lightguide, that looks like it bends the light to and from the optical sensor 90 degrees, to avoid mounting the sensor on its own board, parallel to the case.
-
- You can swap in ordinary rechargeable AAA batteries in seconds with no tools.
- While it is durable, and repairs are unlikely, the components most likely to fail can't be replaced without damaging the device.
- Haptic vibration motor is cemented down with some spectacularly tough glue.
- You won't be servicing anything here without a guide and courage enough to drill out the plastic plug guarding the single, well-hidden access point.


まとめ
リペアビリティのスコア


(10点が最も修理しやすい指標です)

10 件のコメント
What is the outside of the Surface Dial made out of? Is it aluminium?
I remember a surface engineer saying it was a magnesium aluminum alloy
https://www.youtube.com/watch?v=JzqLCIwI...
You can watch this video and do a more detailed explanation.
How do you reduce the tightness of the wheel and make it turn loosely/freely?
John Dusek - 返信
It is not supposed to turn loose and freely. Try bugging logitech to make a similar device, but they would probably want to make it feel like the surface dial because most people love it for how it feels.