はじめに
This is a full, non-destructive disassembly guide of the Logitech Spotlight.
必要な工具と部品
-
-
This teardown is a result of the main button being indented permanently.
-
I hope it can also be used as a guide for battery replacement, PCB repair and all the things you might imagine.
-
Enjoy!
-
-
-
Removing the back cover:
-
The plastic cover with the "logi" logo is mainly glued on. on the top of the remote, there is a little tab.
-
Start prying with a soft plastic plectrum or a sharp knife at the bottom edge.
-
Be careful to not damage the plastic like I did - it's very soft!
-
Removing the top cover:
-
Just like the back, the top plastic cover is also just glued on and is very easy to remove.
-
-
-
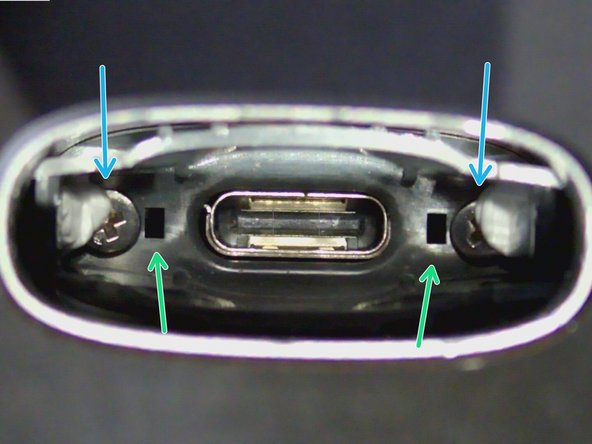
This is by far the most tricky part. Other teardowns describe this as destructive, however, it is possible to get it out in one piece:
-
Remove the USB-dongle.
-
For that, slip a very small flat-head screwdriver between the aluminium housing and the plastic piece.
-
I was able to wiggle it loose and get under a small lip to then remove it fully
-
Pay attention that two more plastic pieces will fall out. These are not broken of, they are there so the piece you just removed can be clipped in, whilst still having a "smooth" inside for the recepticle and USB-C charging port.
-
-
-
-
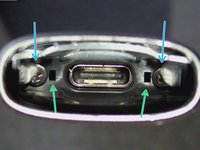
To remove the inner plastic sled containing the actual remote, remove the following screws:
-
2 very small screws at the top.
-
2 screws where you just removed the USB dongle recepticle.
-
Remember the two plastic pieces that fell out? This is where you later have to place them again
-
When you removed these 4 screws, you are able to slide the inner sled out of the top of the housing.
-
-
-
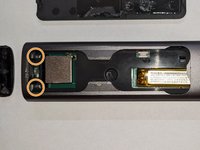
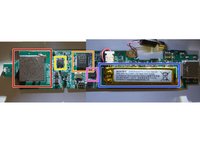
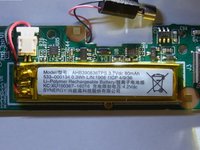
The PCB is attached with three screws to the plastic sled. Remove them to get the PCB, including the vibration motor and LiPo battery out.
-
-
-
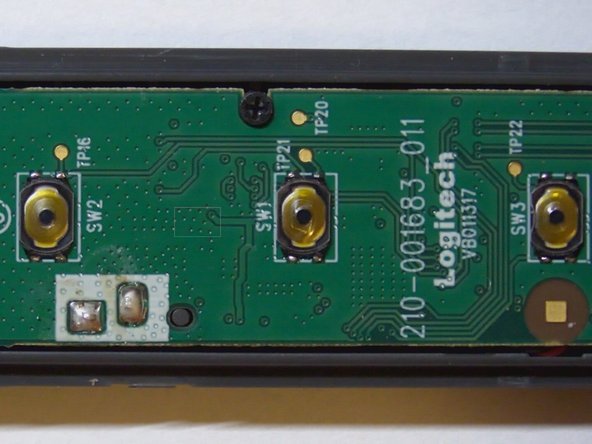
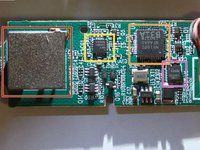
On the top of the PCB, there is not much going on except a lot of testing points.
-
You can also see the connection points of the tiny vibration motor.
-
-
-
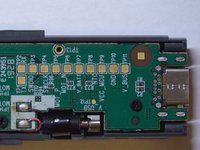
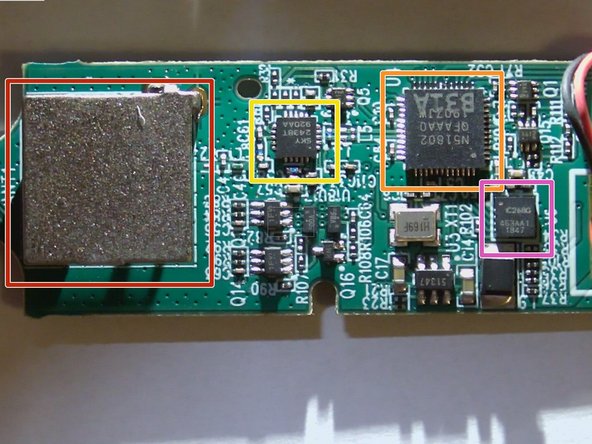
This is now the interesting side of the PCB:
-
You can see the 3D antenna here
-
The device is powered by a Nordic Semi N51802. These Nordic Semis are quite common on Logitech peripherials.
-
In addition to that, a SkyWorks 2438T Zigbee and Smart-Energy Module is right next to it.
-
The Gyro and Sensing Unit is a IC268G from InvenSense
-
Last but not least, the LiPo battery is a 80 mAh jobby with 4.2V and 0.3 Wh
-
-
-
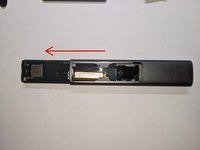
The main button is secured with two very low-profile screws.
-
Remove these.
-
The metal plate is additionally secured with a little bit of sticky tape.
-


3 件のコメント
Hi Dennis, awesome teardown! I wish I would've found that one a year ago :D
Btw can you your teardown to the Logitech Spotlight device page? (Logitech Spotlight Wireless Presenter)
Hi Nils, I assume you mean something like "can you add your teardown" - I unfortunately don't know how, but feel free to add it to your page :)
Dennis -
Thank you for the teardown.
This was my first ever attempt to repairing an electronic device and you guide helped greatly in replacing the battery.
Nothing broke and it worked on the first try. :)