はじめに
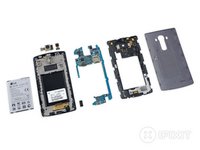
The LG G4 is all about luxury, with its touted camera and genuine leather rear case options. But will LG afford us the luxury of repair? Join us as we tear down the G4 and shoot it full of X-rays—courtesy of our friends at Creative Electron.
Loving the X-ray imagery? Don't miss our Apple Watch X-ray teardown.
Want to see inside all the latest gadgets? Follow us on Instagram, Twitter, and Facebook!
必要な工具と部品
-
-
The LG G4 isn't powered by g-forces or guinea pigs; here's what it's actually packing:
-
5.5" IPS "Quantum" display with 2560 x 1440 resolution (538 ppi)
-
6-core, 1.8 GHz, 64-bit Qualcomm Snapdragon 808 processor
-
3 GB RAM
-
32 GB on-board storage, expandable up to an additional 2 TB via microSD card
-
16 MP, f/1.8 rear camera with OIS and laser-guided autofocus, and 8 MP f/2.0 front camera
-
802.11 a/b/g/n/ac wi-fi, Bluetooth 4.1 BLE, and NFC connectivity
-
Android 5.1 Lollipop
-
-
-
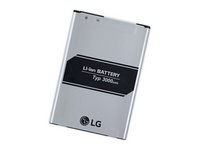
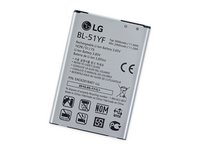
The G4's 3.85 V lithium-ion battery is rated for a minimum of 11.2 Wh. While LG's marketing department doesn't make any specific claims about battery life, they've made sure to let us know that the 3,000 mAh battery lasts and lasts.
-
The Galaxy S6 ranks close behind at 3.85 V, 9.82 Wh.
-
The iPhone 6 features a 3.82 V battery with an energy rating of 6.91 Wh.
-
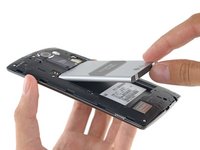
Despite the impressive specs, we think the most exciting feature of this battery is the fact that it's easily removable.
-
It's refreshing to see that LG seems to be one of the few holdouts in the corporate war against user-replaceable batteries...since, you know, batteries eventually die.
-
-
-
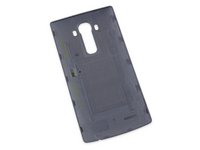
It may look like an ordinary slab of plastic, but this, dear friends, is what freedom looks like! The wee plastic tabs on the rear case allow it to snap off with ease—a simple technology that we thought was as lost to us as Roman concrete.
-
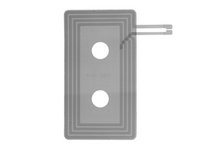
But wait, there's more! We see some contacts peeking out of the plastic.
-
A few X-rays later, we uncover the camouflaged NFC antenna, not a wireless charging coil.
-
-
-
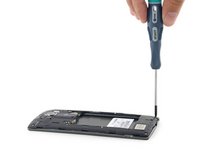
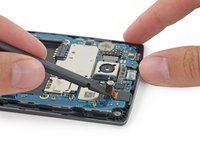
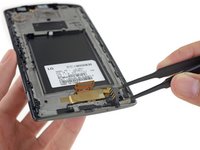
We got all the way to the midframe before needing to so much as open our tool bag. First out of the bag is our Pro Tech Screwdriver Set with the handy, standard Phillips #0.
-
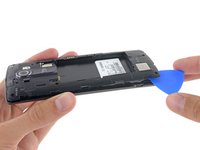
Next, we grab an opening pick and tease up the midframe, revealing the heart of the G4.
-
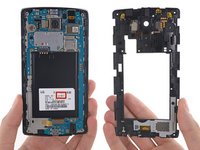
We take a quick note of the G4's model number—LG-H811— before
rending it asundermoving forward.
-
-
-
-
The 8 MP selfie cam is no match for our spudger.
-
Most notable about this little camera is the somewhat controversial smoothing effect, which seems to be helpful in common shooting situations—if you don't need sharp details.
-
LG is trying to help out its Instagram fans: better photos, and you still get to say #nofilter. Technically.
-
-
-
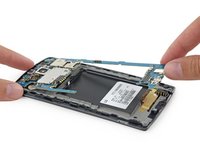
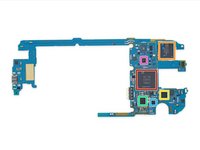
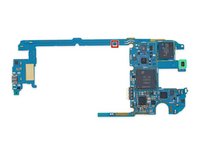
We pull out the G4's motherboard and get a better view of its silicon. Check out these ICs:
-
Samsung K3QF6F60AM-QGCF 3 GB LPDDR3 RAM
-
The Hexa-Core, 1.8 GHz Qualcomm Snapdragon 808 SOC is layered beneath the RAM.
-
Toshiba THGBMFG8C4LBAIR 32 GB NAND Flash
-
Broadcom BCM4339HKUBG 5G WiFi Client
-
Qualcomm PMI8994 Power Management IC
-
IDT P9025A Qi Wireless Power Receiver IC
-
Qualcomm WTR3925 LTE Transceiver
-
-
-
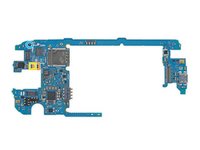
Rear-facing chips:
-
Avago ACPM-7717 Multiband Multimode Power Amplifier
-
Qualcomm WCD9330 Audio Codec
-
SlimPort ANX7816 Ultra-HD Transmitter
-
Qualcomm PM8994 Power Management IC
-
NXP 47883 NFC Controller
-
Qualcomm QFE2101 antenna tuner (likely)
-
Texas Instruments TAS2552 4 W smart amplifier w/ speaker protection
-
-
-
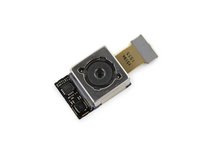
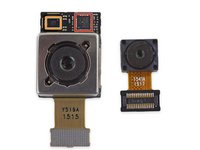
Going back to the rest of the G4, we lift out the 16 MP rear-facing camera for a closer look.
-
The camera sports a 1/2.6" image sensor as well as laser autofocus and optical image stabilization. The main focus of discussion, however, has been the camera's f/1.8 aperture.
-
From this end of the G4, we're also able to catch a glimpse of its IR blaster (to the left of the microphone hole).
-
Let's just hope that using this phone as a remote doesn't doom it to the couch cushions forever...
-
-
-
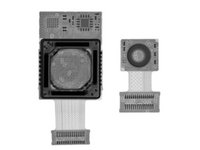
The complexity of the rear-facing camera and its image stabilization is even more apparent under X-ray. That frame! Those chips!
-
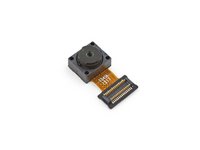
The wee camera next door is the front-facing camera; just a simple lens and image sensor, with no OIS mechanism.
-
And on its side, the rear-facing cam kinda looks like Nessie. Conspiracy? Probably not.
-
Fantastic beasts aside, we do identify some real-life silicon:
-
TDK Invensense IDG-2021 2-axis MEMS optical image stabilization gyroscope
-
ON Semiconductor LC898122A optical image stabilization/auto focus driver
-
-
-
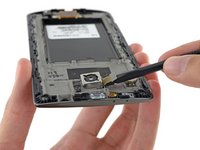
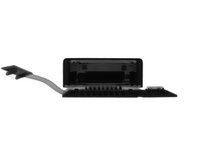
We turn our attention to the headphone jack and tweeze it out of the chassis.
-
It's a good day when the headphone jack is easier to replace than most components in your headphones, er, earpods.
-
This audio jack is footloose and fancy-free.
-
Spring contacts are a great way to connect components; no soldering, no fuss, and a snap to replace.
-
The darkest portions of the X-ray are the metal of the contacts, which carry power and data to and from the audio jack to the motherboard. The rest of the gray is simply the plastic housing.
-
-
-
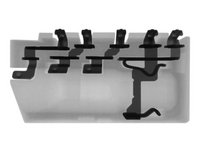
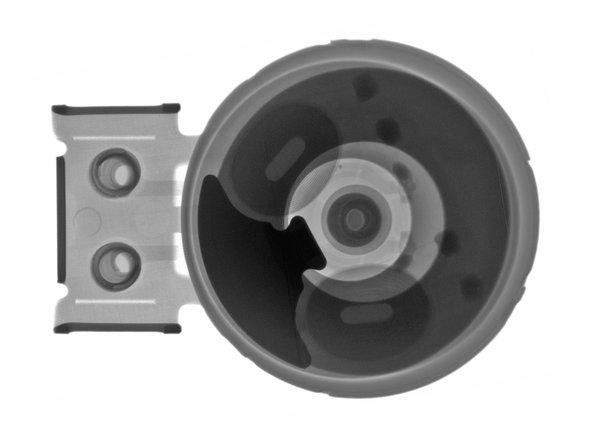
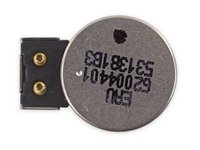
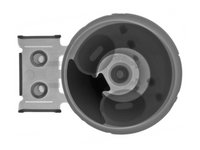
Another spring-contact-applied component: the vibrator!
-
The vibrator appears to be a coin vibration motor. The two oblong 'O' shapes are coils of wire, and the dark anvil shape is a weight that spins, making the motor shake.
-
From the side, the spring contacts get more volume, and you can even see the individual wire filaments in the coils. Neat.
-
-
-
LG G4 Repairability Score: 8 out of 10 (10 is easiest to repair).
-
Rear panel and battery can be removed with no tools.
-
Many components are modular and can be replaced independently.
-
Standard Phillips #0 screws means a driver is easy to find.
-
Fused display assembly—glass and LCD will need to be replaced together if one or the other breaks.
-
And lastly, we'd like to thank our friends at Creative Electron for their equipment and expertise!
-


74 件のコメント
It must kill LG to have to use Samsung RAM chips.
Corporations do not have emotions.
Almost everybody buys from anybody. Samsung sells parts to Apple, etc, etc.
It's all about maximising profit. Do that and nobody cares where the parts come from (unless your corporation can do it cheaper itself.)
Awesome! I loved this X-Ray feature.