メインコンテンツにスキップ

必要な工具と部品

この分解は修理ガイドでは ありません。 お持ちのEpson Stylus Photo 820を修理する際は、iFixitの修理ガイドをご利用ください。

  1. Epson Stylus Printhead Teardown, Epson Stylus Printhead Teardown: 手順 1、 1の画像 1
    • Here it is - the Epson Stylus Photo 820's printhead assembly.

  2. Epson Stylus Printhead Teardown: 手順 2、 3の画像 1 Epson Stylus Printhead Teardown: 手順 2、 3の画像 2 Epson Stylus Printhead Teardown: 手順 2、 3の画像 3
    • The ink cartridges can easily be removed after opening up the cover. +10 for repairability as this is the only part that will need to be replaced.

    • The dual ribbon cable connector can be seen hiding in the back of the printhead.

  3. Epson Stylus Printhead Teardown: 手順 3、 2の画像 1 Epson Stylus Printhead Teardown: 手順 3、 2の画像 2
    • Each ink cartridge has a tiny circuit board with 5 contacts which can easily be removed with a metal spudger or similar tool.

    • On the other side of the board is a resin blob hiding a chip.

  4. Epson Stylus Printhead Teardown: 手順 4、 2の画像 1 Epson Stylus Printhead Teardown: 手順 4、 2の画像 2
    • Only one screw holds the printhead assembly together.

    • And... The circuit board comes out!

  5. Epson Stylus Printhead Teardown: 手順 5、 1の画像 1
    • Houston, we have a problem.

    • 3 very dense ribbon cables ripped off whatever they were attached too when the logic board was removed.

    • Hopefully, no one will have to repair one of these.

  6. Epson Stylus Printhead Teardown: 手順 6、 1の画像 1
    • All that is left in the plastic block is the 10 spring contacts that connect the ink cartridge chips to the main board.

  7. Epson Stylus Printhead Teardown: 手順 7、 2の画像 1 Epson Stylus Printhead Teardown: 手順 7、 2の画像 2
    • Let's take a look at the circuit board.

    • This flexible circuit connects the actual print head to the circuit board.

    • The dual ribbon cable connector

    • The contacts for the ink cartridge chips

    • This appears to be a test point of some kind.

    • This decoder/multiplexer chip on the flexible circuit appears to take 16 inputs and provides over 240 outputs for the print head.

  8. Epson Stylus Printhead Teardown: 手順 8、 3の画像 1 Epson Stylus Printhead Teardown: 手順 8、 3の画像 2 Epson Stylus Printhead Teardown: 手順 8、 3の画像 3
    • Finally. Time to get inside the print head.

    • The print head is held in place by a metal cover that is held in place with blobs of melted plastic.

    • This colorful assembly is the actual print head.

  9. Epson Stylus Printhead Teardown: 手順 9、 2の画像 1 Epson Stylus Printhead Teardown: 手順 9、 2の画像 2
    • This row of 6 holes is the end of the tubes that transfer ink from the cartridges to the print head.

    • Here you can see the contacts for the cartridge chips.

  10. Epson Stylus Printhead Teardown: 手順 10、 2の画像 1 Epson Stylus Printhead Teardown: 手順 10、 2の画像 2
    • This is a close-up view of the most important part in any inkjet printer.

    • Penny for scale

    • 10 Euro Cent coin for scale

    • For scale in the third dimension, the printhead is 0.3 mm (0.01 inches) thick.

  11. Epson Stylus Printhead Teardown: 手順 11、 2の画像 1 Epson Stylus Printhead Teardown: 手順 11、 2の画像 2
    • Here is a color-coded diagram of how the printhead is built. The only difference is that there 3 ink nozzles in a row instead of over 40.

    • Ink flows from the cartridge into the printhead through the red circles.

    • Ink flows into chambers underneath the piezo elements (marked by orange lines).

    • Individually addressable piezo elements for each nozzle cover the ink chambers.

    • The piezo elements are connected to a common ground by metal strips.

    • (Second image) The ribbon cable (shown as a blue overlay) connects the other terminal of all the piezo elements to the multiplexer.

  12. Epson Stylus Printhead Teardown: 手順 12、 1の画像 1
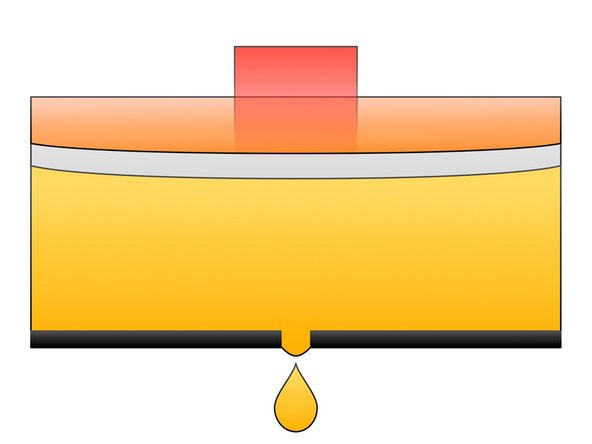
    • Here is another view. The gray area in the middle is the ink chamber.

    • The red rectangle (behind the orange) is the ink inlet.

    • The orange rectangle is the piezo element.

    • The green rectangle is the opening in the bottom that acts as the nozzle.

  13. Epson Stylus Printhead Teardown: 手順 13、 3の画像 1 Epson Stylus Printhead Teardown: 手順 13、 3の画像 2 Epson Stylus Printhead Teardown: 手順 13、 3の画像 3
    • Let's answer your last question about the printhead now: How does it print?

    • The action starts in the second picture.

    • The ink inlet fills the chamber with ink (yellow).

    • The ink is prevented from exiting the nozzle by surface tension.

    • (Third image) When the printer needs to print, electrical current is applied to the piezo element which expands, creates pressure, and forces a single drop of ink out of the nozzle.

    • The (microscopic) drop of ink falls on the paper.

    • The contraction of the piezo element causes the remaining ink in the nozzle opening to be sucked back into the chamber.

    • Keep in mind that this printer has to control over 240 piezo elements which move over the paper many times in the time it takes to print a single page.

  14. Epson Stylus Printhead Teardown: 手順 14、 1の画像 1
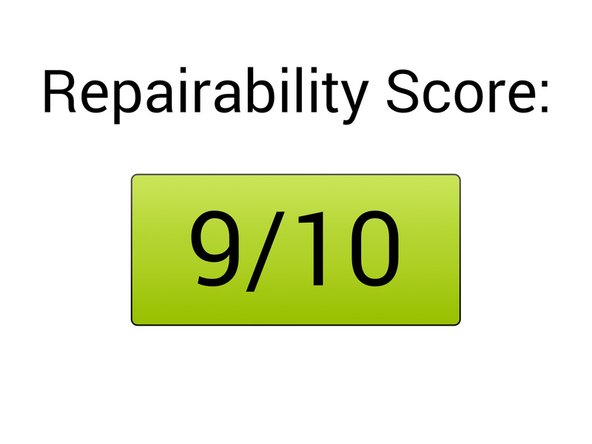
    • It is hard to give a bad repairability score to this device, because only one part of it will need to be replaced.

    • The ink cartridges are very easy to replace (as they should be).

    • The entire assembly is held together by one screw.

    • The actual print head is very delicate and is too small to be repaired, so if it breaks the entire printer will have to be replaced.

    • Update: I have now granted a repairability score to the Epson Stylus 820 Photo printer.

作成者

2人の作成者と共同で作成されました。

jdp23

メンバー登録日: 08/22/13

1,302 ポイント

23のガイドは作成済み

2 件のコメント

Wow THIS IS A VERY GOOD ARTICLE. MUCH LOVE

free2rhyme17 - 返信

I would not give Epson a 9/10 since their printers fail for many other non-repairable reasons. In particular, the microprocessor code is very flaky and throws general errors which can be impossible to hunt down. An example is startup testing of all components. Epsons will test a scanner, and before you can diagnose any problems, it cancels the startup and shuts down all access. E-90 errors are nearly impossible to find if they’re not simple paper jams. Mechanically: 9/10 Electronically: 2/10

Herb Kanis - 返信

コメントを追加

統計データ:

過去 24時間: 0

過去 7 日: 2

過去 30 日: 9

今までの合計 8,403