注意:あなたは必要条件ガイドを編集しています。あなたが行なう変更は、この手順を含む全ての4個のガイドに反映されます。
手順 4を翻訳中
手順4


-
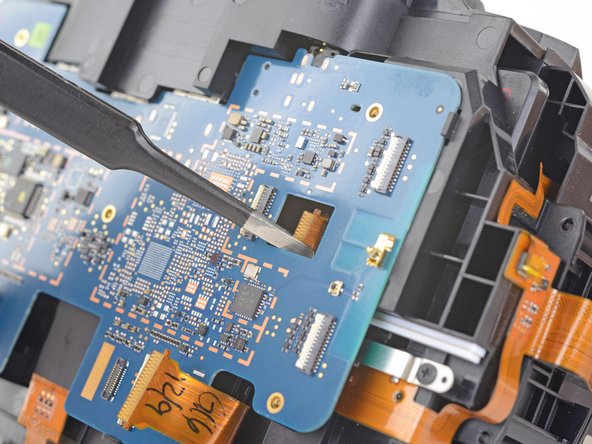
Use a pair tweezers to slightly twist the interconnect cable and press it down until the tabs on either side of the cable clear the hole in the motherboard.
| - | [* black] Use a pair tweezers to slightly twist the interconnect cable and press it down until the tabs on either side of the cable clear the hole in the motherboard. |
|---|---|
| + | [* black] Use a pair [product|IF145-020|tweezers] to slightly twist the interconnect cable and press it down until the tabs on either side of the cable clear the hole in the motherboard. |
| [* icon_reminder] During reassembly, make sure to thread the interconnect cable through its slot in the motherboard. |
クリエイティブコモンズのオープンソース著作権のもと、あなたの投稿は著作権の対象となります。