メインコンテンツにスキップ

HP 250 G3 WiFi Card Replacement

英語
日本語

手順 10を翻訳中

手順10
HP 250 G3 WiFi Card Replacement, removing upper plate/case: 手順 0、 3の画像 1 HP 250 G3 WiFi Card Replacement, removing upper plate/case: 手順 0、 3の画像 2 HP 250 G3 WiFi Card Replacement, removing upper plate/case: 手順 0、 3の画像 3
removing upper plate/case
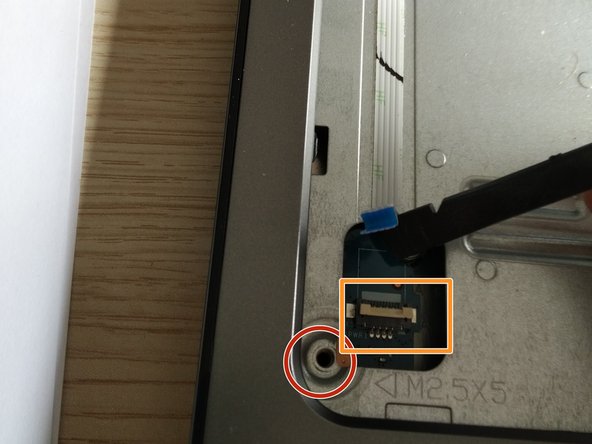
  • Remove the screw circled in the second picture.

  • Remove the tape over the cable and the connector.

  • Remove the white ribbon cable from the connector.

  • Open up the lid with a spudger, and gently remove the ribbon cable.

  • Use caution, as the ribbon cable is pasted to the plate.

  • This ribbon cable is the connector from the ON/OFF switch.

ここに翻訳を挿入する

ここに翻訳を挿入する

ここに翻訳を挿入する

ここに翻訳を挿入する

ここに翻訳を挿入する

ここに翻訳を挿入する

クリエイティブコモンズのオープンソース著作権のもと、あなたの投稿は著作権の対象となります