メインコンテンツにスキップ

Reemplazo de pantalla de Google Pixel

注意:あなたは必要条件ガイドを編集しています。あなたが行なう変更は、この手順を含む全ての6個のガイドに反映されます。

英語
スペイン語

手順 4を翻訳中

手順4
Google Pixel Display Replacement: 手順 0、 3の画像 1 Google Pixel Display Replacement: 手順 0、 3の画像 2 Google Pixel Display Replacement: 手順 0、 3の画像 3
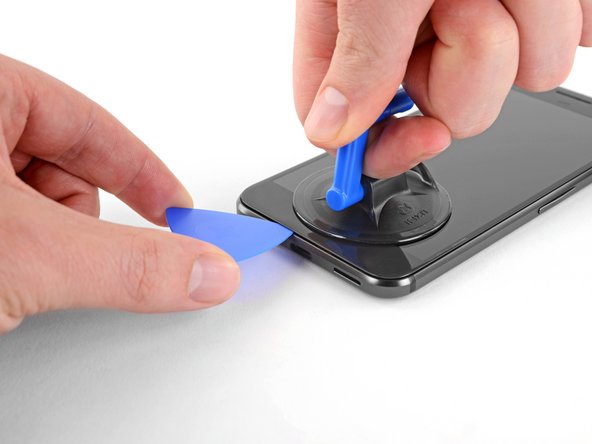
  • Insert an opening pick or a playing card into the gap between the chassis and the display assembly.

  • Begin to slide the opening pick around the edge of the display, cutting through the adhesive that secures it.

  • Do not try to lift or pry the screen off with the pick. Simply slide it around to detach the adhesive.

  • The display panel is extremely fragile. If you plan to re-use your display, take care to insert your tool only as far as necessary to separate the adhesive. Inserting the tool any further can damage the OLED panel under the glass.

Inserta un púa de apertura o una tarjeta de juego en el espacio entre el chasis y el ensamblaje de la pantalla.

Comienza a deslizar la púa de apertura alrededor del borde de la pantalla, cortando el adhesivo que lo asegura.

La pantalla es frágil. Si planeas reutilizarla, ten cuidado de insertar tu herramienta solo lo necesario para separar el adhesivo.

El panel de visualización es extremadamente frágil. Si planeas reutilizar su pantalla, ten cuidado de insertar tu herramienta solo lo necesario para separar el adhesivo. Si insertas más la herramienta, puedes dañar el panel OLED debajo del vidrio.

クリエイティブコモンズのオープンソース著作権のもと、あなたの投稿は著作権の対象となります