メインコンテンツにスキップ

LeapFrog LeapPad 2 Screen Assembly Replacement

注意:あなたは必要条件ガイドを編集しています。あなたが行なう変更は、この手順を含む全ての2個のガイドに反映されます。

英語
日本語

手順 2を翻訳中

手順2
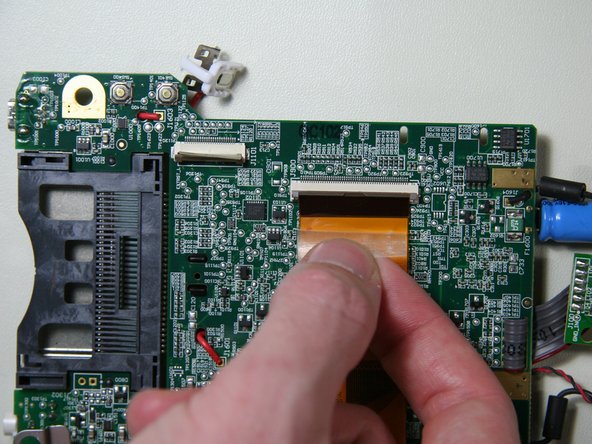
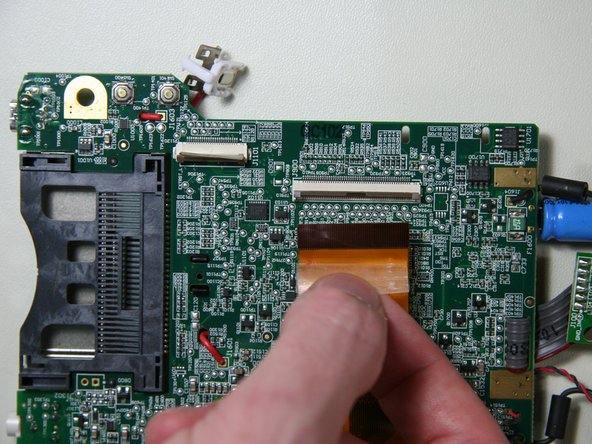
LeapFrog LeapPad 2 Screen Assembly Replacement: 手順 0、 3の画像 1 LeapFrog LeapPad 2 Screen Assembly Replacement: 手順 0、 3の画像 2 LeapFrog LeapPad 2 Screen Assembly Replacement: 手順 0、 3の画像 3
  • Open the display connector by lifting on the brown latch with a plastic opening tool or a finger until it is in a vertical position.

  • Failing to do this correctly could result in damage to the cable and/or connector.

  • Gently pull on the display ribbon cable and it should easily slide out of the connecter.

  • If the connector is properly open, disconnecting the ribbon cable should require little to no force.

ここに翻訳を挿入する

ここに翻訳を挿入する

ここに翻訳を挿入する

ここに翻訳を挿入する

クリエイティブコモンズのオープンソース著作権のもと、あなたの投稿は著作権の対象となります