手順 17を翻訳中
手順17


-
We temporarily shift our attention to a more screw-y, less glue-y portion of this desktop, in the hopes that we will have more luck in removing it.
-
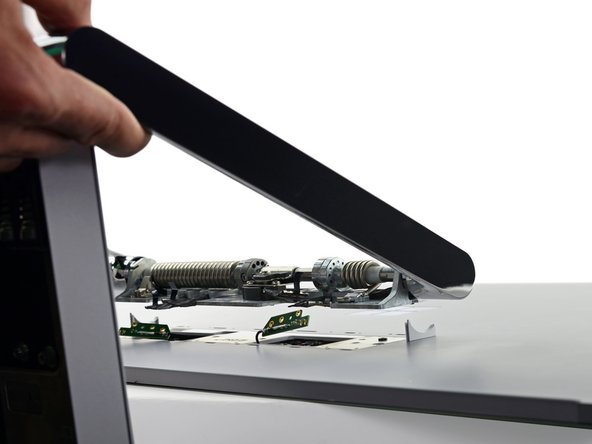
Lacking a specialized tool for the job, we hand-beast the hinge casing off the back of the display. A slew of tiny clips keep it tightly stuck, with no adhesive or screws.
-
Underneath lurks a pair of antennas, significantly-more-than-a-pair of springs, and loads of screws.
-
Removing the screws securing the hinge to the display is like playing Russian Roulette: some are spring-loaded while others are not. We test our odds, and manage to select all of the correct screws for removal, detaching the base without a springtastic explosion.
クリエイティブコモンズのオープンソース著作権のもと、あなたの投稿は著作権の対象となります。