メインコンテンツにスキップ

Microsoft Surface Pro 2 マザーボードの交換

注意:あなたは必要条件ガイドを編集しています。あなたが行なう変更は、この手順を含む全ての5個のガイドに反映されます。

英語
日本語

手順 2を翻訳中

手順2
Microsoft Surface Pro 2 Motherboard Replacement: 手順 0、 3の画像 1 Microsoft Surface Pro 2 Motherboard Replacement: 手順 0、 3の画像 2 Microsoft Surface Pro 2 Motherboard Replacement: 手順 0、 3の画像 3
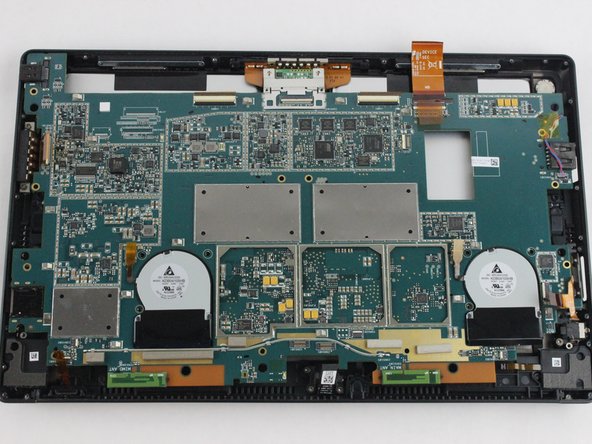
  • Once the brackets are removed, set them aside.

  • The motherboard itself also has screws.

  • Remove the 25 screws of varying sizes that attach the motherboard to the back plate.

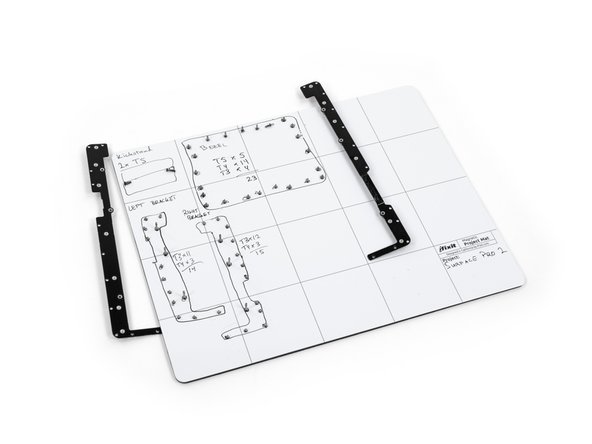
  • View the attached photo of a screw diagram to help keep track of your screws.

ブラケットを取り出したら、傍に置いてください。

マザーボード自体にもネジが留められています。

バックプレートにマザーボードを固定している、25本の異なるサイズのネジを外してください。

3番目の画像をご覧ください。ネジの種類の図表です。このようにご自身のデバイスのネジも装着位置をメモ書きしておきましょう。

クリエイティブコモンズのオープンソース著作権のもと、あなたの投稿は著作権の対象となります