メインコンテンツにスキップ

Google Pixel C Teardown

英語
日本語

手順 13を翻訳中

手順13
Google Pixel C Teardown: 手順 0、 3の画像 1 Google Pixel C Teardown: 手順 0、 3の画像 2 Google Pixel C Teardown: 手順 0、 3の画像 3
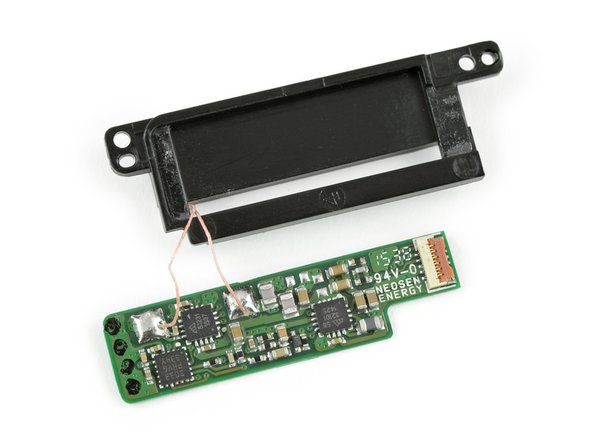
  • This neat little coil feeds the Pixel C's parasitic keyboard, when it's connected in the proper screen-covering position.

  • Having no ports of its own, the keyboard needs inductive charging from the tablet to function. We'll find a twin to this coil in the peripheral.

  • Under the coil, we find a control board—probably responsible for turning boring old DC power from the battery into exciting, varying-magnetic-field-generating AC to power the coil.

  • Chips found on this PCB include a STMicroelectronics STM8S003F3 8-bit microcontroller, a Semtech TS32101 DC-DC boost converter, and a Semtech TS51231 wireless power system transmitter.

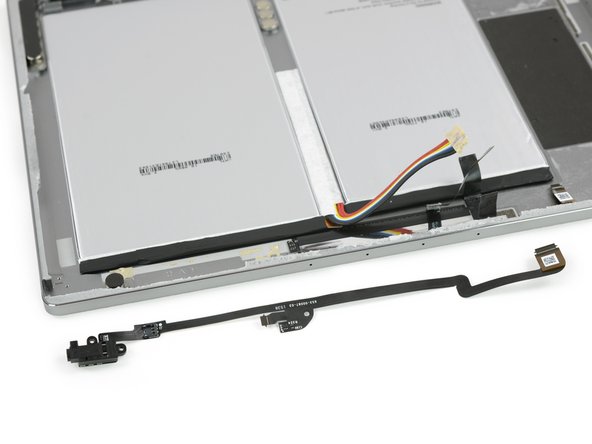
  • We also get to peel out this record-breaking headphone jack port with the longest tail ever.

  • It actually does double duty as an interconnect cable for the inductive coil and the right speaker.

ここに翻訳を挿入する

ここに翻訳を挿入する

ここに翻訳を挿入する

ここに翻訳を挿入する

ここに翻訳を挿入する

ここに翻訳を挿入する

クリエイティブコモンズのオープンソース著作権のもと、あなたの投稿は著作権の対象となります