メインコンテンツにスキップ

Nexus 6P Daughterboard/Charging Port Replacement

英語
日本語

手順 5を翻訳中

手順5
Nexus 6P Daughterboard/Charging Port Replacement: 手順 0、 3の画像 1 Nexus 6P Daughterboard/Charging Port Replacement: 手順 0、 3の画像 2 Nexus 6P Daughterboard/Charging Port Replacement: 手順 0、 3の画像 3
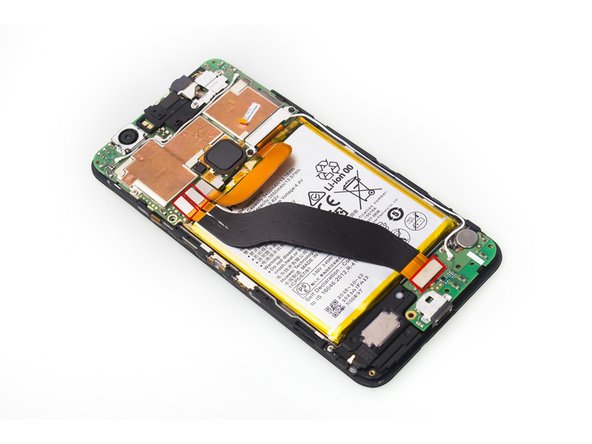
  • Unscrew one Phillips screw.

  • Remove metal bracket securing flex contactors.

  • Release 3 flex contactors and remove it .

  • This flex is used to connect motherboard and daughterboard.

ここに翻訳を挿入する

ここに翻訳を挿入する

ここに翻訳を挿入する

ここに翻訳を挿入する

クリエイティブコモンズのオープンソース著作権のもと、あなたの投稿は著作権の対象となります