注意:あなたは必要条件ガイドを編集しています。あなたが行なう変更は、この手順を含む全ての19個のガイドに反映されます。
手順 4を翻訳中
手順4


-
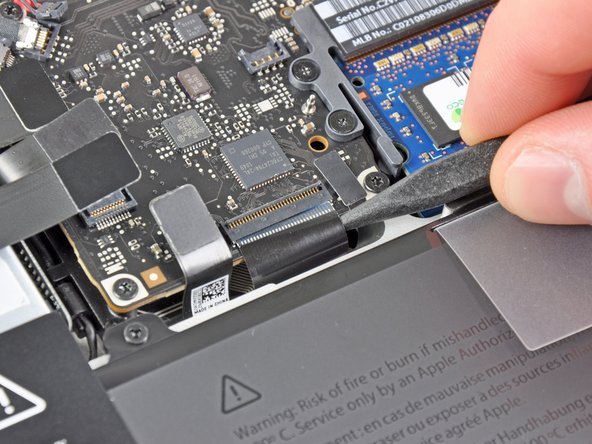
Use your fingernail to flip up the retaining flap on the keyboard ribbon cable ZIF socket.
-
Use the tip of a spudger to pull the keyboard ribbon cable out of its socket.
| [* black] Use your fingernail to flip up the retaining flap on the keyboard ribbon cable ZIF socket. | |
| [* icon_caution] Be sure you are prying up on the hinged retaining flap, ***not*** the socket itself. | |
| [* black] Use the tip of a spudger to pull the keyboard ribbon cable out of its socket. | |
| + | [* icon_reminder] The cable may be difficult to insert. If you are having trouble, temporarily attach a piece of tape to the cable to help you guide the cable into the socket. |
クリエイティブコモンズのオープンソース著作権のもと、あなたの投稿は著作権の対象となります。