メインコンテンツにスキップ

Xbox 360 Lower Case Replacement

注意:あなたは必要条件ガイドを編集しています。あなたが行なう変更は、この手順を含む全ての12個のガイドに反映されます。

英語
中国語

手順 2を翻訳中

手順2
Xbox 360 Lower Case Replacement: 手順 0、 3の画像 1 Xbox 360 Lower Case Replacement: 手順 0、 3の画像 2 Xbox 360 Lower Case Replacement: 手順 0、 3の画像 3
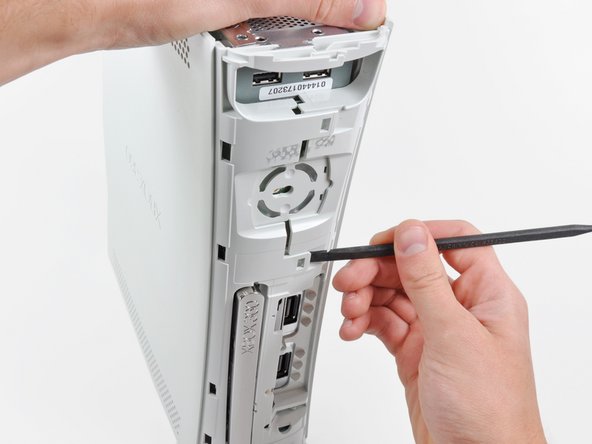
  • The upper and lower cases are attached via several latches, located in the front and back of the console. These latches must be disengaged to separate the upper case from the console.

  • Use the flat end of a spudger to release the following latches:

  • Above the front-facing USB ports.

  • Beneath the front-facing USB ports.

  • Above the Memory Unit slots.

ここに翻訳を挿入する

ここに翻訳を挿入する

ここに翻訳を挿入する

ここに翻訳を挿入する

ここに翻訳を挿入する

クリエイティブコモンズのオープンソース著作権のもと、あなたの投稿は著作権の対象となります