メインコンテンツにスキップ

Remplacement du voyant d'état de la Nintendo 64

英語
フランス語

手順 3を翻訳中

手順3
Nintendo 64 LED status light replacement: 手順 0、 2の画像 1 Nintendo 64 LED status light replacement: 手順 0、 2の画像 2
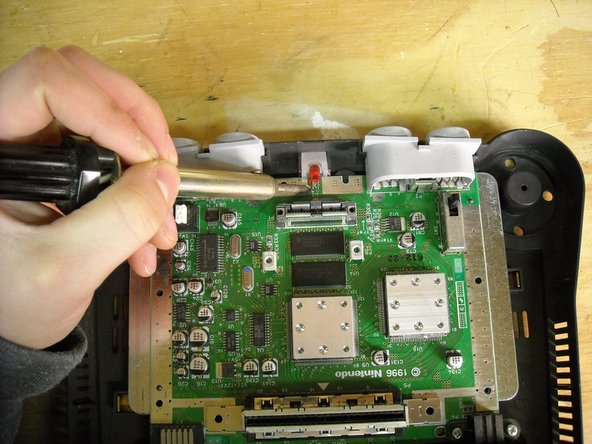
  • To remove the light, start by heating up a soldering utensil. When it is hot, place the tip onto either one of the pin slots to soften the connection between the pin and the board. Repeat this process on the other pinhole.

Pour retirer la diode, commencez par chauffer votre fer à souder. Lorsqu'il est chaud, placez la pointe sur l'une des fentes de la broche pour assouplir la connexion entre la broche et la carte. Répétez cette opération sur l'autre trou d'épingle.

クリエイティブコモンズのオープンソース著作権のもと、あなたの投稿は著作権の対象となります