注意:あなたはさきほど閲覧しているガイドの前提となるページを編集しています。あなたが行った変更は、この手順を含むガイド全体に影響を与えます。
手順 3を翻訳中
手順3


Disconnect/peel off ribbon cables
-
Starting from the top edge, lift the display slightly.
-
Before completely removing the display:
-
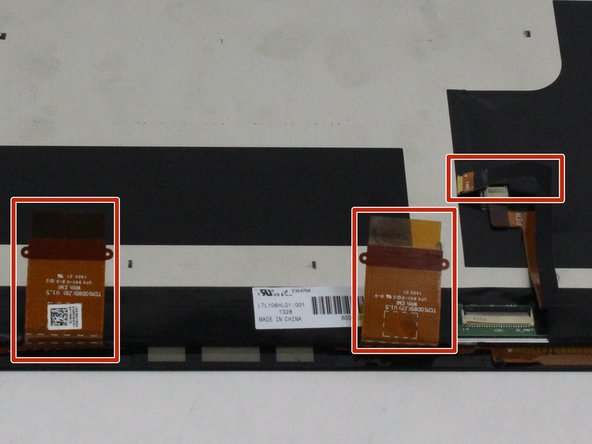
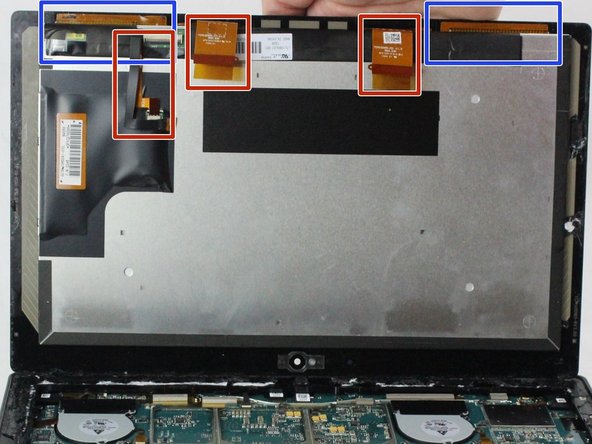
Disconnect the three display cables.
-
Gently peel from the frame 2 orange ribbon cables that are glued to it, as those should stay with the display. (e.g. use a thin plastic card to separate them)
| - | [* black] Starting from the top edge, lift the display slightly. If you feel any resistance, use heat and an opening pick to slice through any remaining adhesive. |
|---|---|
| - | [* red] Before completely removing the display, disconnect the three display cables. |
| + | [title] Disconnect/peel off ribbon cables |
| + | [* black] Starting from the top edge, lift the display slightly. |
| + | [* icon_caution] If you feel any resistance, use heat and an opening pick to slice through any remaining adhesive. |
| + | [* black] Before completely removing the display: |
| + | [* red] Disconnect the three display cables. |
| + | [* blue] Gently peel from the frame 2 orange ribbon cables that are glued to it, as those should stay with the display. (e.g. use a thin plastic card to separate them) |
クリエイティブコモンズのオープンソース著作権のもと、あなたの投稿は著作権の対象となります。