メインコンテンツにスキップ

Samsung Galaxy Z Flip 3 スクリーン付きフレームアセンブリの交換

英語
日本語

手順 10を翻訳中

手順10
Samsung Galaxy Z Flip 3 Screen and Frame Assembly Replacement, Disconnect Power Then Remove Wireless Charging Pad: 手順 0、 3の画像 1 Samsung Galaxy Z Flip 3 Screen and Frame Assembly Replacement, Disconnect Power Then Remove Wireless Charging Pad: 手順 0、 3の画像 2 Samsung Galaxy Z Flip 3 Screen and Frame Assembly Replacement, Disconnect Power Then Remove Wireless Charging Pad: 手順 0、 3の画像 3
Disconnect Power Then Remove Wireless Charging Pad
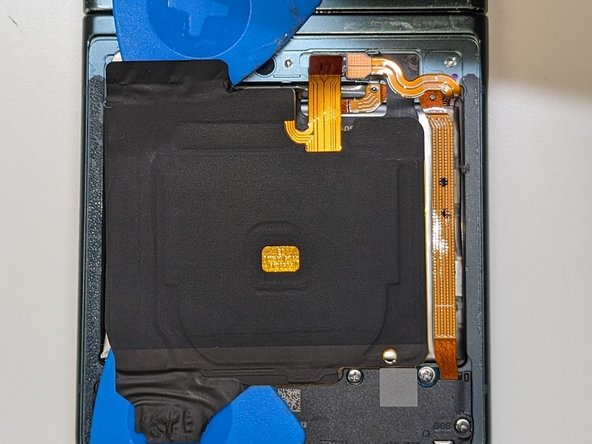
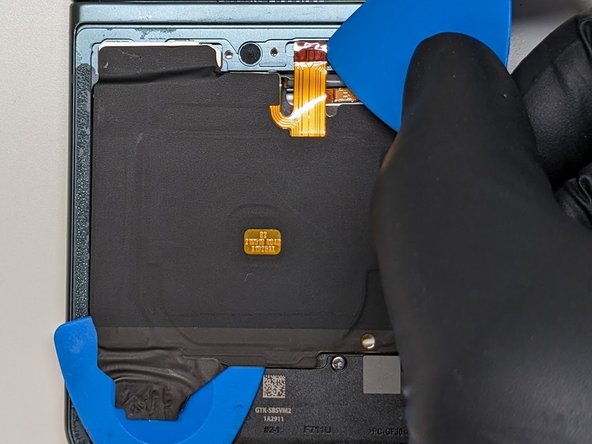
  • Next, Pull the power (Connector on the Right) to the lower battery. Yup, there are two!

  • Use the Isopropyl alcohol again on the Triangle Picks to help undo the adhesive holding down the wireless charging pad.

  • Pop the connector for the wireless charging pad and set it aside.

次に、下部のバッテリーの電源(右のコネクタ)を引き抜きます。ここになんとバッテリーが二つあるんです!

イソプロピルアルコールを再度三角ピックに使用し、ワイヤレス充電パッドを固定している接着剤を剥がします。

ワイヤレス充電パッドのコネクタを引き抜き傍に置きます。

クリエイティブコモンズのオープンソース著作権のもと、あなたの投稿は著作権の対象となります