メインコンテンツにスキップ

ロジクール MX Master 3 バッテリーの交換

英語
日本語

手順 1を翻訳中

手順1
Logitech MX Master 3S Battery Replacement, Disconnect the battery: 手順 0、 3の画像 1 Logitech MX Master 3S Battery Replacement, Disconnect the battery: 手順 0、 3の画像 2 Logitech MX Master 3S Battery Replacement, Disconnect the battery: 手順 0、 3の画像 3
Disconnect the battery
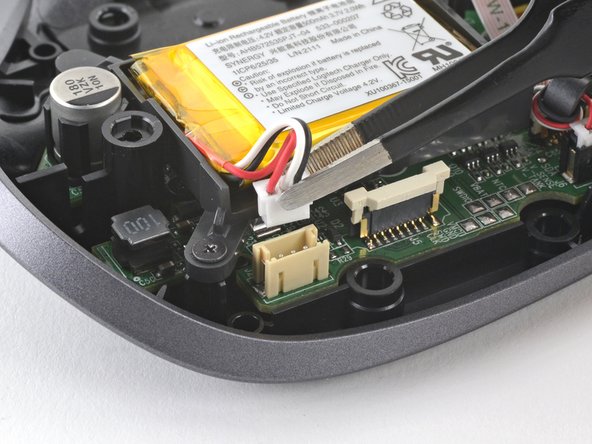
  • Use a pair of tweezers to grip the top of the battery connector.

  • Always pull cables by their connectors and not the wires themselves.

  • Gently rock the connector side to side and pull it out of its socket.

  • The connector is held tightly within its socket. If it feels stuck, try a different grip—use the protrusions around the neck of the connector if you need more leverage.

  • If the connector won't budge, skip to the next step for an alternate method.

バッテリーのコネクターの上部をピンセットでつかみます。

ケーブルは、ワイヤーそのものではなく、必ずコネクタを持って引き抜きます。

コネクタをゆっくりと左右に揺らしながら、ソケットから引き抜きます。

コネクタはソケット内でしっかりと固定されています。引っ掛かりを感じたら、別の握り方を試してみてください。もっと力が必要な場合は、コネクタの首の周りの突起を使用してください。

コネクタが動かない場合は、次のステップに進んで別の方法を試してください。

クリエイティブコモンズのオープンソース著作権のもと、あなたの投稿は著作権の対象となります