メインコンテンツにスキップ

Reemplazo de la pantalla del Nokia G22

英語
スペイン語

手順 5を翻訳中

手順5
Nokia G22 Screen Assembly Replacement, Lift out the battery: 手順 0、 3の画像 1 Nokia G22 Screen Assembly Replacement, Lift out the battery: 手順 0、 3の画像 2 Nokia G22 Screen Assembly Replacement, Lift out the battery: 手順 0、 3の画像 3
Lift out the battery
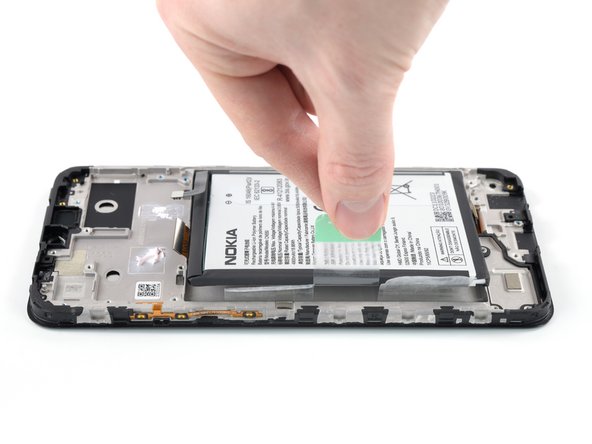
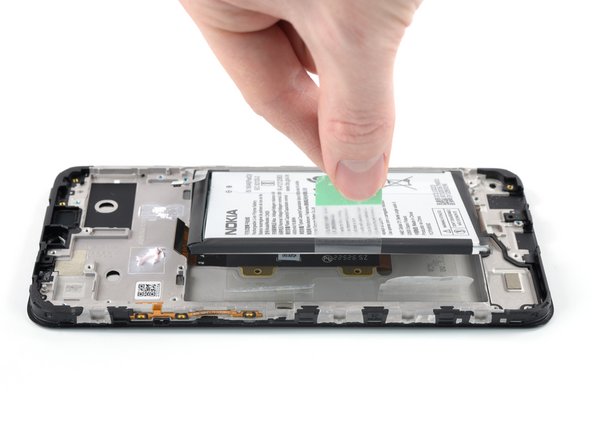
  • The battery in the Nokia G22 is secured with adhesive. A pull tab is provided to separate the adhesive and remove the battery.

  • Use your fingers to peel the center green pull tab off of the battery.

  • Using one hand to hold the phone down, use your other hand to slowly and steadily lift the center green pull tab up to separate the adhesive securing the battery underneath.

  • If the green pull tab should rip, you can use the outer tabs to pull out the battery including the adhesive film underneath. Be aware that therefore this will take more time and probably some heat to soften the adhesive.

  • If you have any difficulties with stubborn battery adhesive, you can contact "Nokia phones support".

La batería del Nokia G22 está fijada con adhesivo. Hay una lengüeta para separar el adhesivo y extraer la batería.

Utiliza los dedos para despegar la lengüeta verde central de la batería.

Con una mano sujeta el teléfono y con la otra levanta lenta y firmemente la lengüeta verde central para separar el adhesivo que sujeta la batería por debajo.

Si la lengüeta verde se rasga, puede utilizar las lengüetas exteriores para extraer la batería, incluida la película adhesiva que se encuentra debajo. Ten en cuenta que esto te llevará más tiempo y probablemente algo de calor para ablandar el adhesivo.

Si tienes alguna dificultad con el adhesivo de batería persistente, puedes ponerte en contacto con el "soporte de teléfonos Nokia".

クリエイティブコモンズのオープンソース著作権のもと、あなたの投稿は著作権の対象となります