メインコンテンツにスキップ

Nokia G22 Screen Assembly Replacement

手順 3を翻訳中

英語
中国語
手順3
Nokia G22 Screen Assembly Replacement, Remove the foam pad: 手順 0、 3の画像 1 Nokia G22 Screen Assembly Replacement, Remove the foam pad: 手順 0、 3の画像 2 Nokia G22 Screen Assembly Replacement, Remove the foam pad: 手順 0、 3の画像 3
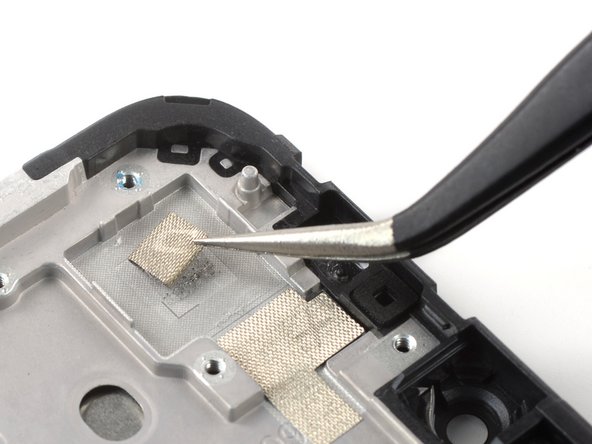
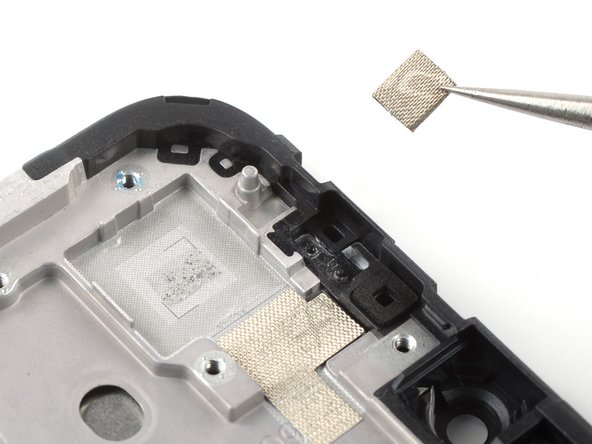
Remove the foam pad
  • If your new screen assembly comes with a foam pad you can skip this step. If not you’ll need to transfer the old pad or apply a new one.

  • Use a pair of tweezers to carefully peel the foam off of the frame to remove it.

  • The foam pad in the camera recess is held in place with mild adhesive.

  • During reassembly, transfer the old foam pad or install a new one for the new screen assembly. You can install the camera bracket first to help orient the foam pad.

ここに翻訳を挿入する

ここに翻訳を挿入する

ここに翻訳を挿入する

ここに翻訳を挿入する

クリエイティブコモンズのオープンソース著作権のもと、あなたの投稿は著作権の対象となります