注意:あなたは必要条件ガイドを編集しています。あなたが行なう変更は、この手順を含む全ての5個のガイドに反映されます。
手順 6を翻訳中
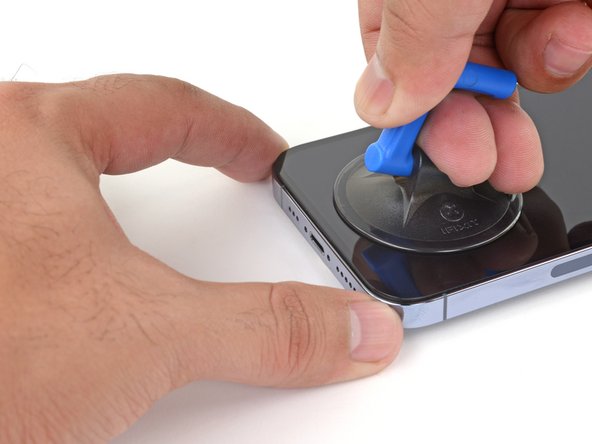
手順6


Insert an opening pick
-
Apply a suction handle to the bottom edge of the phone, while avoiding the very edge of the glass.
-
Pull up on the suction cup with firm, constant pressure to create a slight gap between the screen and the frame.
-
Insert an opening pick into the gap under the screen's plastic bezel.
クリエイティブコモンズのオープンソース著作権のもと、あなたの投稿は著作権の対象となります。