メインコンテンツにスキップ

Nintendo Switch 右ジョイコン SL/SR ボタンフレキ基板の交換

英語
日本語

手順 5を翻訳中

手順5
Nintendo Switch Right Joy-Con SL/SR Button Board Replacement: 手順 0、 3の画像 1 Nintendo Switch Right Joy-Con SL/SR Button Board Replacement: 手順 0、 3の画像 2 Nintendo Switch Right Joy-Con SL/SR Button Board Replacement: 手順 0、 3の画像 3
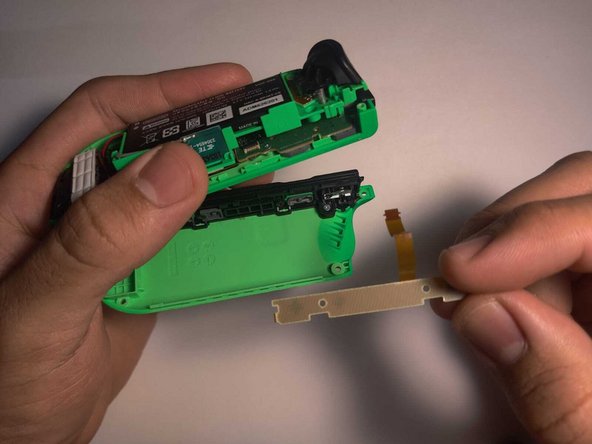
  • Use the plastic spudger tool to lift the tab lock holding the bent button board cable. Lightly lift the battery compartment to have more space while doing so.

  • Once the tab is unlocked, remove the bent cable.

バッテリーを軽く持ち上げて、スパッジャーツールで、ボタンフレキ基板を止めているタブ ロックを持ち上げます。

タブのロックが解除されたら、フレキケーブルを取り外します。

クリエイティブコモンズのオープンソース著作権のもと、あなたの投稿は著作権の対象となります