メインコンテンツにスキップ

Nintendo GameCube 光学ドライブアセンブリの交換

注意:あなたはさきほど閲覧しているガイドの前提となるページを編集しています。あなたが行った変更は、この手順を含むガイド全体に影響を与えます。

英語
日本語

手順 5を翻訳中

手順5
Nintendo GameCube Optical Drive Assembly Replacement: 手順 0、 3の画像 1 Nintendo GameCube Optical Drive Assembly Replacement: 手順 0、 3の画像 2 Nintendo GameCube Optical Drive Assembly Replacement: 手順 0、 3の画像 3
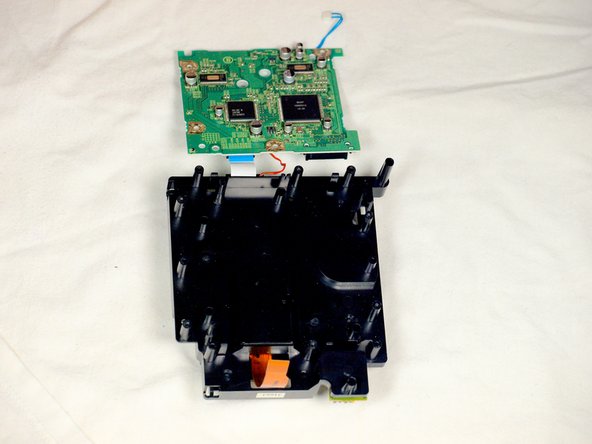
  • Gently lift the metal plate off the drive assembly.

  • Be careful not to sever the red wire or the white ribbon cable still attached to the two halves of the drive assembly.

  • Then, flip the two halves of the drive assembly upside down.

ドライブアセンブリからメタルプレートをゆっくりと持ち上げます。

2つのドライブアセンブリに取り付けられている赤いワイヤーや白いリボンケーブルを切断しないように注意してください。

次に、ドライブアセンブリの2つの部分を上下逆にします。

クリエイティブコモンズのオープンソース著作権のもと、あなたの投稿は著作権の対象となります