メインコンテンツにスキップ

Logitech MX Keys バッテリーの交換

英語
日本語

手順 8を翻訳中

手順8
Logitech MX Keys Battery Replacement: 手順 0、 3の画像 1 Logitech MX Keys Battery Replacement: 手順 0、 3の画像 2 Logitech MX Keys Battery Replacement: 手順 0、 3の画像 3
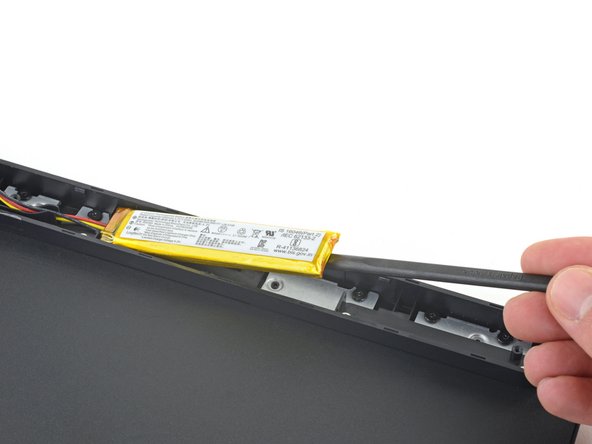
  • Insert the flat end of a spudger underneath the right edge of the battery, opposite the cables.

  • Slide the spudger underneath the battery and gently lift to separate the adhesive securing it to the keyboard.

  • Make sure you push the spudger underneath the battery and not into it. Don't bend or deform the battery.

  • If the battery isn't separating, apply a few drops of isopropyl alcohol (>90%) to its edge and slightly tilt the keyboard. Wait one minute for the alcohol to soften the adhesive and try again.

  • Remove the battery.

バッテリーの右端、ケーブルの反対側に、スパッジャーの平面側先端を差し込みます。

スパッジャーをバッテリーの下にスライドさせ、軽く持ち上げながらバッテリーをキーボードに固定している接着剤を剥がします。

このとき、バッテリーの中に押し込まないように注意してください。バッテリーを曲げたり変形させたりしないでください。

バッテリーが分離しない場合は、バッテリーの端にイソプロピルアルコール(90%以上)を数滴垂らし、キーボードを少し傾けます。アルコールで粘着剤が柔らかくなるまで1分ほど待ち、もう一度試してください。

バッテリーを外します。

クリエイティブコモンズのオープンソース著作権のもと、あなたの投稿は著作権の対象となります