メインコンテンツにスキップ

Reemplazo de batería de teclas Logitech MX

英語
スペイン語

手順 8を翻訳中

手順8
Logitech MX Keys Battery Replacement: 手順 0、 3の画像 1 Logitech MX Keys Battery Replacement: 手順 0、 3の画像 2 Logitech MX Keys Battery Replacement: 手順 0、 3の画像 3
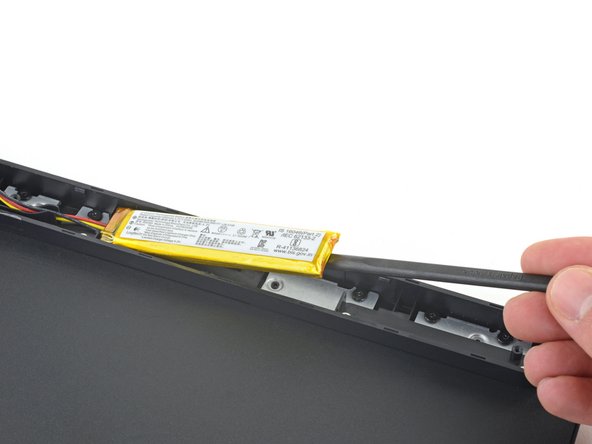
  • Insert the flat end of a spudger underneath the right edge of the battery, opposite the cables.

  • Slide the spudger underneath the battery and gently lift to separate the adhesive securing it to the keyboard.

  • Make sure you push the spudger underneath the battery and not into it. Don't bend or deform the battery.

  • If the battery isn't separating, apply a few drops of isopropyl alcohol (>90%) to its edge and slightly tilt the keyboard. Wait one minute for the alcohol to soften the adhesive and try again.

  • Remove the battery.

Inserta el extremo plano de un spudger debajo del extremo corto de la batería opuesto a los cables.

Empuja el spudger debajo de la batería, separándolo del adhesivo que lo sujeta al teclado.

Asegúrate de empujar debajo de la batería y no dentro de ella. No dobles ni deformes la batería.

Si la batería no se quita con facilidad, aplica unas gotas de alcohol isopropílico de alta concentración (≥90 %) debajo e inclina el teclado para dirigir el alcohol hacia el adhesivo.

Retira la batería.

Para instalar una batería de repuesto:

Retira cualquier resto de adhesivo del hueco de la batería.

Aplica cinta de doble cara o adhesivo precortado para asegurar la batería nueva.

クリエイティブコモンズのオープンソース著作権のもと、あなたの投稿は著作権の対象となります