メインコンテンツにスキップ

Logitech MX Keys 배터리 교체

手順 6を翻訳中

英語
韓国語
手順6
Logitech MX Keys Battery Replacement, Remove the battery: 手順 0、 3の画像 1 Logitech MX Keys Battery Replacement, Remove the battery: 手順 0、 3の画像 2 Logitech MX Keys Battery Replacement, Remove the battery: 手順 0、 3の画像 3
Remove the battery
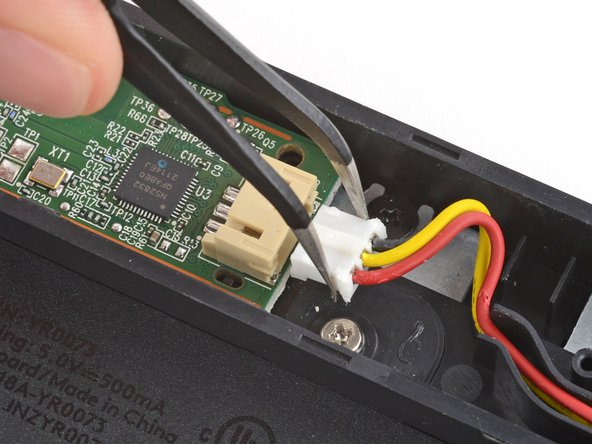
  • Use a pair of angled tweezers to firmly grip the battery connector and slide it straight out of its socket.

  • If you're having trouble, gently rock the connector side-to-side to help loosen it.

  • During reassembly:

  • Insert the connector into its socket so the side with raised plastic in the center is facing up.

  • Push on the edges of the connector with the flat end of a spudger until it's fully seated in the socket.

각진 핀셋을 사용하여 배터리 커넥터를 꽉 잡고 소켓에서 똑바로 밀어 빼내세요.

문제가 있는 경우 커넥터를 좌우로 살살 흔들면 느슨하게 풀릴 수 있습니다.

재조립할 때:

중앙에 돌출된 플라스틱이 있는 면이 위를 향하도록 커넥터를 소켓에 끼우세요.

커넥터가 소켓에 완전히 고정될 때까지 스퍼저의 납작한 끝으로 커넥터의 가장자리를 밀어 넣으세요.

クリエイティブコモンズのオープンソース著作権のもと、あなたの投稿は著作権の対象となります