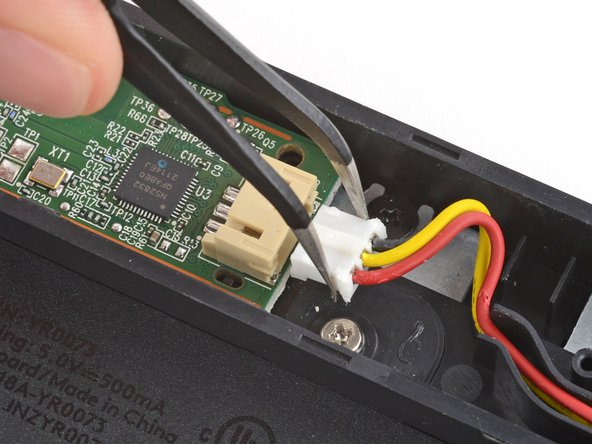
メインコンテンツにスキップ

Logitech MX Keys バッテリーの交換

英語
日本語

手順 6を翻訳中

手順6
Logitech MX Keys Battery Replacement, Remove the battery: 手順 0、 3の画像 1 Logitech MX Keys Battery Replacement, Remove the battery: 手順 0、 3の画像 2 Logitech MX Keys Battery Replacement, Remove the battery: 手順 0、 3の画像 3
Remove the battery
  • Use a pair of angled tweezers to firmly grip the battery connector and slide it straight out of its socket.

  • If you're having trouble, gently rock the connector side-to-side to help loosen it.

  • During reassembly:

  • Insert the connector into its socket so the side with raised plastic in the center is facing up.

  • Push on the edges of the connector with the flat end of a spudger until it's fully seated in the socket.

角度のついたピンセットを使ってバッテリーのコネクターをしっかりと握り、ソケットからまっすぐスライドさせます。

うまくいかない場合は、コネクターを軽く左右に揺らしてみると緩みやすくなります。

再組み立ての際

コネクタをソケットに差し込み、中央のプラスチックが盛り上がっている側を上に向けます。

コネクターがソケットに完全に収まるまで、スパッジャーの平面部分でコネクタの端を押し込みます。

クリエイティブコモンズのオープンソース著作権のもと、あなたの投稿は著作権の対象となります