メインコンテンツにスキップ

Reemplazo de batería de teclas Logitech MX

手順 6を翻訳中

英語
スペイン語
手順6
Logitech MX Keys Battery Replacement, Remove the battery: 手順 0、 3の画像 1 Logitech MX Keys Battery Replacement, Remove the battery: 手順 0、 3の画像 2 Logitech MX Keys Battery Replacement, Remove the battery: 手順 0、 3の画像 3
Remove the battery
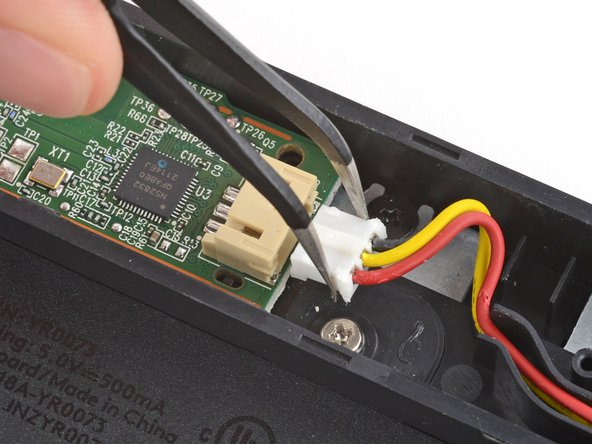
  • Use a pair of angled tweezers to firmly grip the battery connector and slide it straight out of its socket.

  • If you're having trouble, gently rock the connector side-to-side to help loosen it.

  • During reassembly:

  • Insert the connector into its socket so the side with raised plastic in the center is facing up.

  • Push on the edges of the connector with the flat end of a spudger until it's fully seated in the socket.

Usa un spudger para "sacar" suavemente el cable de la batería de su conector.

Durante el montaje, asegúrate de que el conector de la batería no esté al revés antes de insertarlo.

クリエイティブコモンズのオープンソース著作権のもと、あなたの投稿は著作権の対象となります