メインコンテンツにスキップ

Google Pixel 4a 5G スクリーンの交換

注意:あなたはさきほど閲覧しているガイドの前提となるページを編集しています。あなたが行った変更は、この手順を含むガイド全体に影響を与えます。

英語
日本語

手順 15を翻訳中

手順15
Google Pixel 4a 5G Screen Replacement, Remove the screen: 手順 0、 3の画像 1 Google Pixel 4a 5G Screen Replacement, Remove the screen: 手順 0、 3の画像 2 Google Pixel 4a 5G Screen Replacement, Remove the screen: 手順 0、 3の画像 3
Remove the screen
  • Remove the screen.

  • To install a new screen:

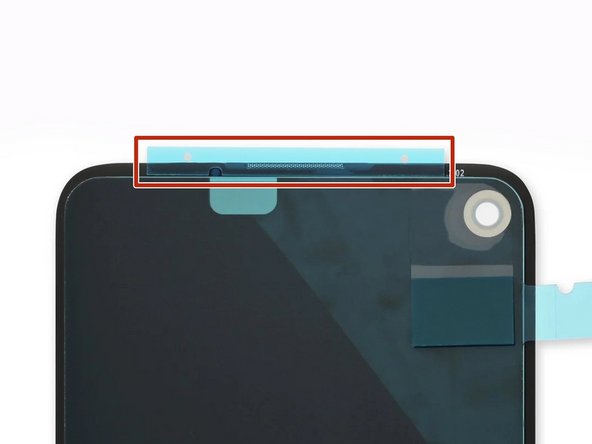
  • Check if your replacement screen has speaker mesh and top edge adhesive pre-installed.

  • If it does, you won't need the top edge adhesive.

  • If it doesn't, remove the larger clear liner from the top edge adhesive and apply it to the screen (not the frame). Make sure the larger cutout lines up with the speaker mesh.

  • Follow this guide to apply the custom-cut adhesive.

  • Use the third photo as a reference to position your adhesives.

  • During the boot-up process after reassembly, the screen will go through a calibration sequence. Don't touch the screen during this process, as it could result in improper touch calibration and create touch issues.

これでスクリーンが取り外せるようになりました。

新しいスクリーンを取り付ける際は、以下の点に注意してください。

交換用スクリーンにスピーカーメッシュと上辺の両面テープが取り付けられているか確認して下さい。

もし取り付けられているなら、上辺用の両面テープは使いません。

取り付けられていない場合は、上辺用の両面テープから大きい透明な剥離シートを剥がして、(筐体ではなく)スクリーンに貼って下さい。大きい切り欠きがスピーカーメッシュと同じ位置になるようにして下さい。

カスタムカットされた両面テープを使用する場合は、こちらのガイドを参照してください。

どの場所にどの両面テープを貼るのかについては、3枚目の画像をご覧下さい。

再組み立て後の起動中に、スクリーンはキャリブレーション画面へと移行します。この間、スクリーンに触れないでください。不適切なタッチキャリブレーションが行われ、タッチの問題が発生する可能性があります。

クリエイティブコモンズのオープンソース著作権のもと、あなたの投稿は著作権の対象となります