メインコンテンツにスキップ

Google Pixel 4ディスプレイアセンブリの交換

英語
日本語

手順 3を翻訳中

手順3
Google Pixel 4 Display Assembly Replacement: 手順 0、 3の画像 1 Google Pixel 4 Display Assembly Replacement: 手順 0、 3の画像 2 Google Pixel 4 Display Assembly Replacement: 手順 0、 3の画像 3
  • This process will almost always destroy the OLED display panel. Only proceed if you are replacing an already-broken display assembly.

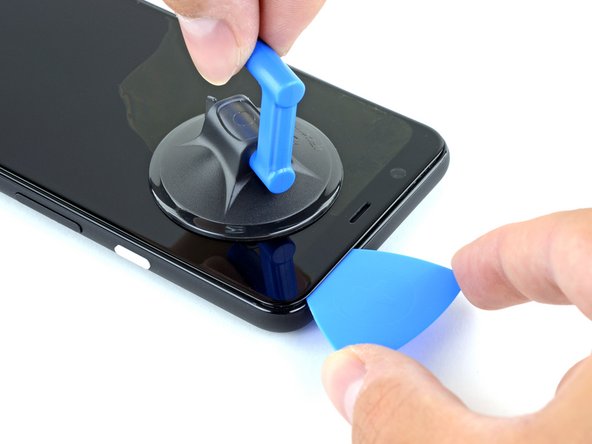
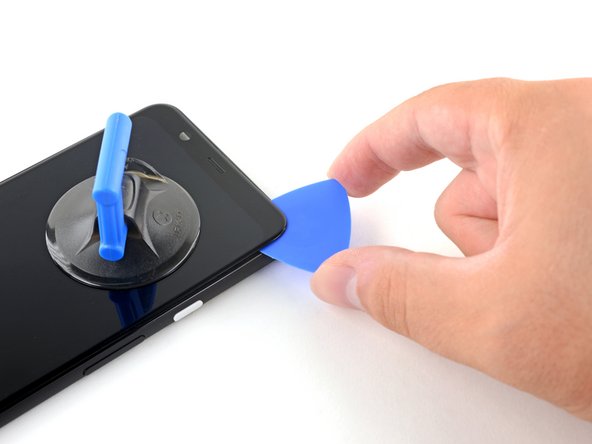
  • Apply a suction cup to the heated edge of the display assembly

  • If your display is badly cracked, covering it with a layer of clear packing tape may allow the suction cup to adhere. Alternatively, very strong tape may be used instead of the suction cup. If all else fails, you can superglue the suction cup to the broken display assembly.

  • Pull up on the suction cup with strong, steady force to create a gap between the display assembly and the frame.

  • Depending on the age of your phone, this may be difficult. If you are having trouble, apply heat to the edge and try again.

  • Insert the point of an opening pick into the gap.

  • Depending on the age of your phone, this may take significant force. If you are having trouble, apply more heat and try again.

この作業では、多くの場合、OLEDディスプレイアセンブリパネルを破損してしまいます。すでに破損したディスプレイを交換する場合にのみ、作業を進めてください。

吸盤カップを温めたディスプレイアセンブリ側、できるだけ端に近い位置に装着します。

ディスプレイのダメージが大きい場合は、透明な強力テープをスクリーンに貼って吸盤カップを装着するとうまく固定します。あるいは、強力なテープを吸盤カップの代わりに持ち手を作って引っ張ることもできます。それでも上手くいかない場合は、壊れたディスプレイアセンブリに吸盤カップを装着する際に、カップ上に強力ボンドを付けてください。

吸盤カップを一定の力で引き上げて、ディスプレイアセンブリとフレーム間に隙間ができるまで、しっかりと引き上げます。

デバイスの使用年月にもよりますが、この作業にはかなりの力を要します。作業が難しい場合は、熱で再度温めてから再試行してください。

開口ピックを隙間に差し込みます。

クリエイティブコモンズのオープンソース著作権のもと、あなたの投稿は著作権の対象となります