メインコンテンツにスキップ

Reemplazo de la pantalla LCD y del digitalizador del Huawei P20

ご注意:あなたは前提となるガイドを編集しています。あなたが行なう変更は、この手順を含むガイド全体に反映されます。

英語
スペイン語

手順 2を翻訳中

手順2
Huawei P20 LCD Screen & Digitizer Replacement: 手順 0、 3の画像 1 Huawei P20 LCD Screen & Digitizer Replacement: 手順 0、 3の画像 2 Huawei P20 LCD Screen & Digitizer Replacement: 手順 0、 3の画像 3
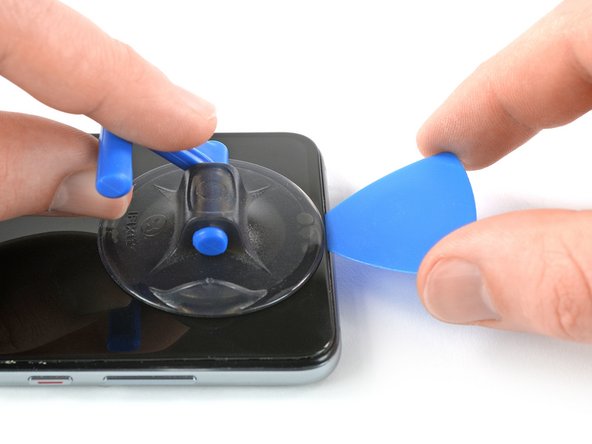
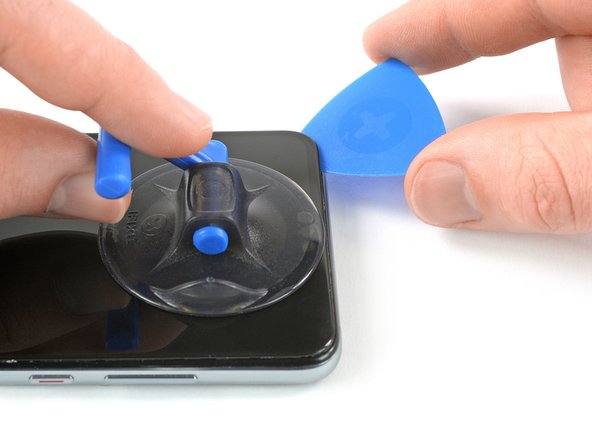
  • Once the screen is warm to the touch, apply a suction cup to the upper edge of the phone.

  • Pull the suction cup upwards and insert an opening pick in the gap between the display glass and the plastic bezel. Start to cut the adhesive by sliding the opening pick to the top left corner.

  • Make sure you get in the right gap between the display and the plastic bezel. Do not pry between the bezel and the midframe.

Una vez que la pantalla esté caliente al tacto, aplica una ventosa en el borde superior del teléfono.

Tira de la ventosa hacia arriba e introduce una púa de apertura en el hueco entre el cristal de la pantalla y el bisel de plástico. Comienza a cortar el adhesivo deslizando la púa de apertura hacia la esquina superior izquierda.

Asegúrate de que entras en el hueco correcto entre la pantalla y el bisel de plástico. No hagas palanca entre el bisel y el marco intermedio.

クリエイティブコモンズのオープンソース著作権のもと、あなたの投稿は著作権の対象となります