メインコンテンツにスキップ

Reemplazo de la pantalla del Samsung Galaxy S10e

ご注意:あなたは前提となるガイドを編集しています。あなたが行なう変更は、この手順を含むガイド全体に反映されます。

英語
スペイン語

手順 1を翻訳中

手順1
Samsung Galaxy S10e Screen Replacement, Slice through the screen adhesive: 手順 0、 3の画像 1 Samsung Galaxy S10e Screen Replacement, Slice through the screen adhesive: 手順 0、 3の画像 2 Samsung Galaxy S10e Screen Replacement, Slice through the screen adhesive: 手順 0、 3の画像 3
Slice through the screen adhesive
  • Flip the phone over so that the display is facing up.

  • Apply a heated iOpener to the right edge of the screen for two minutes.

  • A hair dryer, heat gun, or hot plate may also be used, but be careful not to overheat the phone—the internal battery is susceptible to heat damage.

  • As you wait, note the following seams:

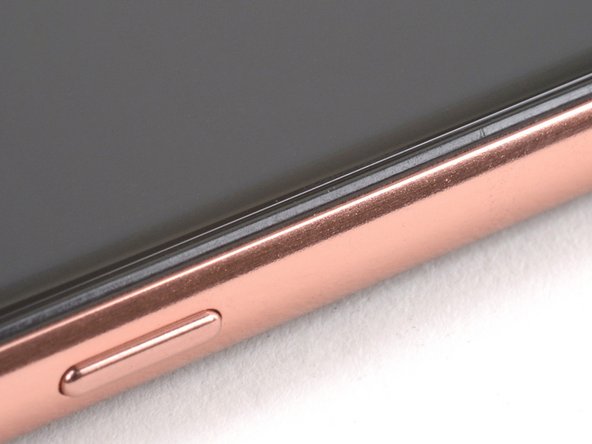
  • Display seam—this seam sits above the thin plastic bezel. You need to pry along this seam to separate the display.

  • Frame seam—this seam sits below the thin plastic bezel. Do not pry along this seam or you will damage the plastic bezel.

Dale la vuelta al teléfono para que la pantalla quede mirando hacia arriba.

Aplica un iOpener calentado en el borde derecho de la pantalla durante dos minutos.

También se puede utilizar un secador de pelo, una pistola de calor o una placa caliente, pero tenga cuidado de no sobrecalentar el teléfono, ya que la batería interna es susceptible de sufrir daños por el calor.

Mientras espera, observa los siguientes rebordes:

Reborde de pantalla : este reborde se encuentra por encima del fino bisel de plástico. Necesitas hacer palanca a lo largo de esta costura para separar la pantalla.

Reborde del marco: este reborde se encuentra debajo del fino bisel de plástico. No te metas a lo largo de este reborde o dañarás el bisel de plástico.

クリエイティブコモンズのオープンソース著作権のもと、あなたの投稿は著作権の対象となります