メインコンテンツにスキップ

Google Pixel 4 XLの分解

英語
日本語

手順 13を翻訳中

手順13
Google Pixel 4 XL Teardown: 手順 0、 3の画像 1 Google Pixel 4 XL Teardown: 手順 0、 3の画像 2 Google Pixel 4 XL Teardown: 手順 0、 3の画像 3
  • Google gifted this Pixel with a supersmooth (sometimes) 90 Hz screen—a rarity thus far, even amongst the flagship-iest of smartphones.

  • Google also made sure nobody could take it from the Pixel without a struggle. Strong perimeter adhesive + screen layers going literally to the edge + giant duct-tape-like adhesive pad = screen does not want to come out intact.

  • In theory there's no reason to do this—only broken screens need be removed this way. But this is not a fun process for replacing an (all too common) broken screen.

  • At least in this case, the result is interesting: this display is manufactured by Samsung! This comes as something of a surprise, given that Samsung has not yet put a 90 Hz display even in its own smartphones.

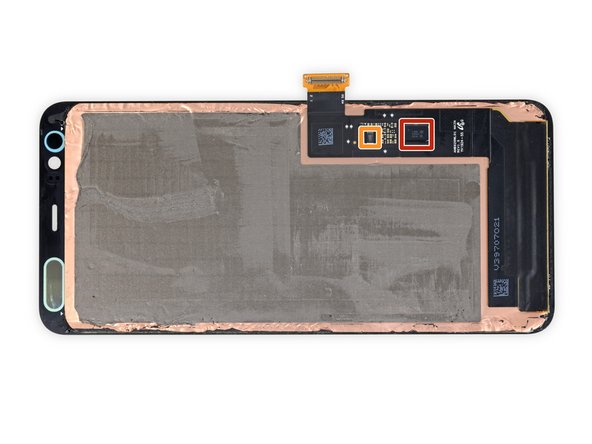
  • On board, we also find a somewhat unexpected chip package from STMicroelectronics, likely a capacitive touchscreen controller.

  • GigaDevice GD25LH80C 8 Mb serial flash memory

GoogleはこのPixelに超スムーズな(ある時は最高で)90Hzのスクリーンを搭載しました。今の所、最強モデルと言われるスマートフォンの中でもこのスクリーンは珍しいです。

Googleは、誰も簡単にそのスクリーンを取り出せないデザイン設計を怠りませんでした。スクリーン周辺の強力な接着剤+エッジに張り巡らされたスクリーンのレイヤー+巨大な接着パッド級のダクトテープ=簡単にスクリーンは外れません。

理論的には、この作業をする理由はありません。しかし、スクリーンが壊れれば、この方法で交換しなければなりません。そして(最も発生頻度の高い) スクリーンの交換は、楽しい作業ではありません。

このケースの最後に残ったものは興味深いものです。このディスプレイはSamsung製造です!Samsungは自社モデルでさえ、90Hzディスプレイをまだ使用していないのに、先にGoogleに手渡すのは驚きです。

ディスプレイ上には、STMicroelectronics製 予想外のチップパッケージが搭載されています。容量性タッチスクリーンコントローラーのようです。

GigaDevice GD25LH80C 8 Mbシリアルフラッシュメモリ

クリエイティブコモンズのオープンソース著作権のもと、あなたの投稿は著作権の対象となります