メインコンテンツにスキップ

iPad Pro 10.5" Openingsprocedure

注意:あなたは必要条件ガイドを編集しています。あなたが行なう変更は、この手順を含む全ての21個のガイドに反映されます。

英語
オランダ語

手順 7を翻訳中

手順7
iPad Pro 10.5" Opening Procedure: 手順 0、 3の画像 1 iPad Pro 10.5" Opening Procedure: 手順 0、 3の画像 2 iPad Pro 10.5" Opening Procedure: 手順 0、 3の画像 3
  • Apply heat to the final, right edge of the iPad for about two minutes, or until it's slightly too hot to touch comfortably.

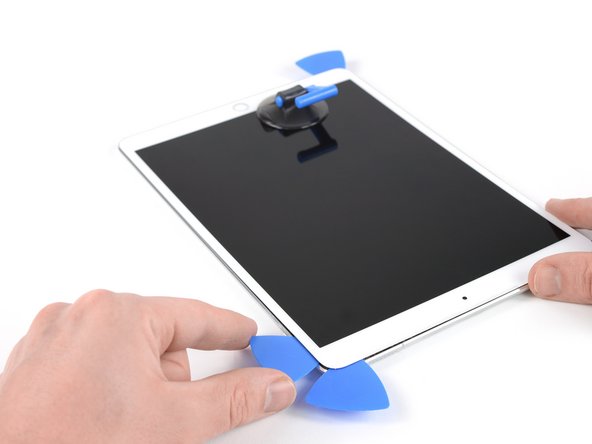
  • Insert a fourth opening pick at the top right corner of the iPad.

  • Slide the opening pick down to the bottom right corner to cut the adhesive.

  • Slide the opening pick around the bottom right corner—pausing to apply more heat if needed—and cut the remaining adhesive on the bottom edge, but stop before you reach the home button.

Leg je iOpener tot slot gedurende twee minuten op de rechterzijde van de iPad of tot deze te warm is om comfortabel aan te raken.

Breng een vierde openingsplectrum aan, in de rechter bovenhoek van de iPad.

Schuif je plectrum langs de rechterzijde naar de rechter onderhoek van de iPad om de lijm onderweg door te snijden.

Schuif je plectrum langs de rechter onderhoek—verwarm je toestel opnieuw indien nodig—en snijd de resterende lijm aan de onderkant door. Stop echter voordat je bij de thuisknop bent.

クリエイティブコモンズのオープンソース著作権のもと、あなたの投稿は著作権の対象となります