メインコンテンツにスキップ

Procedura di apertura

注意:あなたは必要条件ガイドを編集しています。あなたが行なう変更は、この手順を含む全ての9個のガイドに反映されます。

英語
イタリア語

手順 7を翻訳中

手順7
Opening Procedure, Lift the display slightly: 手順 0、 3の画像 1 Opening Procedure, Lift the display slightly: 手順 0、 3の画像 2 Opening Procedure, Lift the display slightly: 手順 0、 3の画像 3
Lift the display slightly
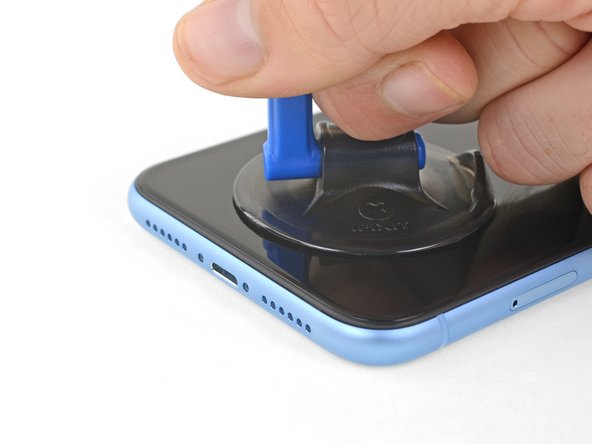
  • Pull up on the suction cup with firm, constant pressure to create a slight gap between the front panel and rear case.

  • Insert an opening pick under the screen and the plastic bezel, not the screen itself.

  • The watertight adhesive holding the display in place is very strong; creating this initial gap takes a significant amount of force. If you're having a hard time opening a gap, apply more heat, and gently rock the screen up and down to weaken the adhesive until you create enough of a gap to insert your tool.

Tira la ventosa applicando una trazione forte e costante fino a creare una piccola fessura tra il pannello frontale e il case posteriore.

Inserisci un plettro di apertura sotto lo schermo e la cornice di plastica, evitando di toccare direttamente lo schermo.

L'adesivo impermeabile che tiene in posizione il display è molto tenace. La creazione di questa fessura iniziale richiede l'applicazione di una forza piuttosto elevata. Se hai difficoltà nell'aprire una fessura, applica altro calore e muovi lo schermo su e giù per indebolire l'adesivo finché non riesci a infilare lo strumento di apertura.

クリエイティブコモンズのオープンソース著作権のもと、あなたの投稿は著作権の対象となります